12-Count Display
STEP 3. Installation of Display
1: Check the Scope of Work under Buyer’s Custom Fields in your Work Order. If something needs to be moved, do so now (ask a store employee for help if it’s merchandise). If an existing PrimoWater display needs to be moved, you will need to remove all water jugs in order to shift it. The store may receive a unit with different Primo Brands (ie. Poland Springs, Zephyrhills, Deer Park, etc). All instructions are exactly the same regardless of the branding.
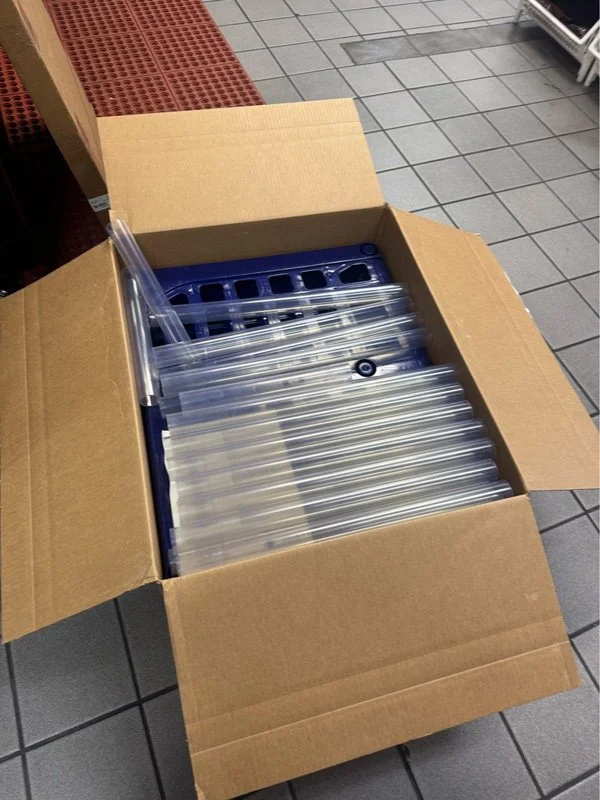
2: Unpack the display from the two shipped boxes.
➡ Unlike all other displays, the 12-Count Display is shipped in 2 boxes via FedEx Ground and doesn’t require a pallet jack.
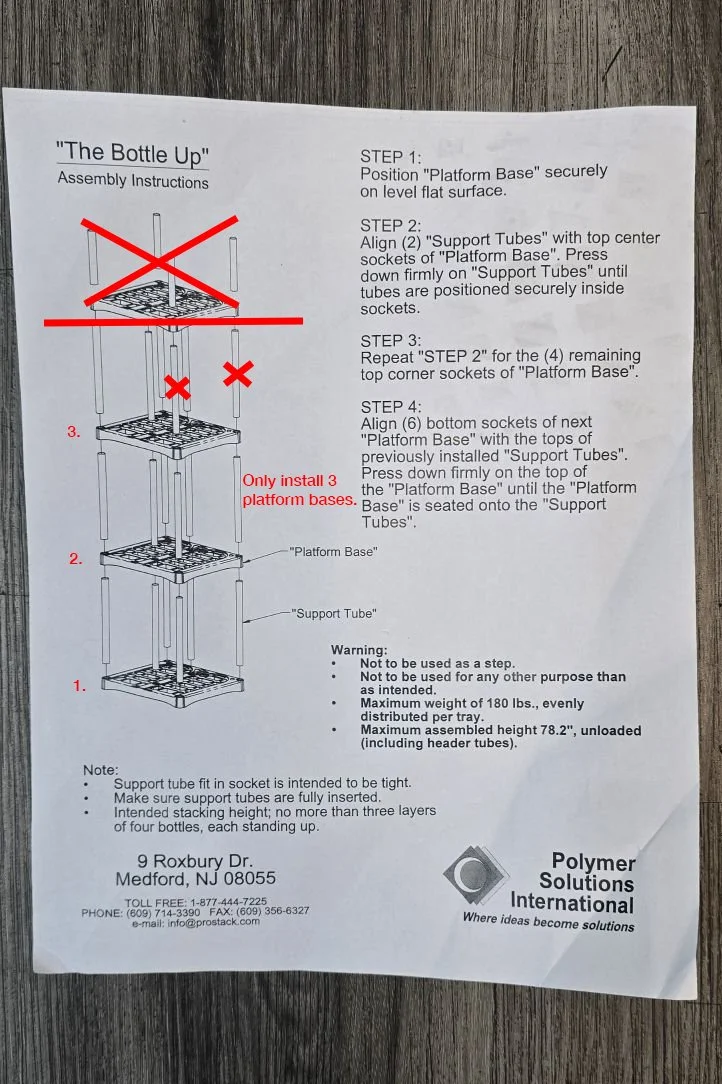
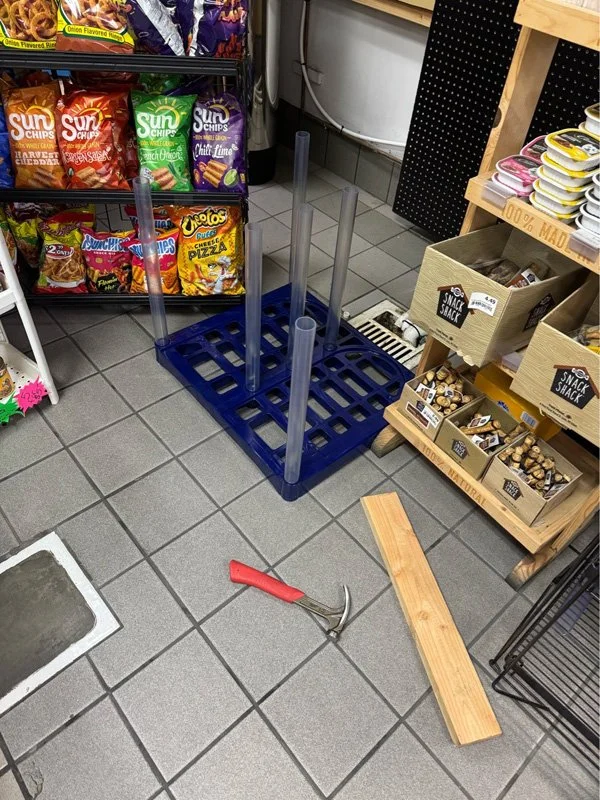
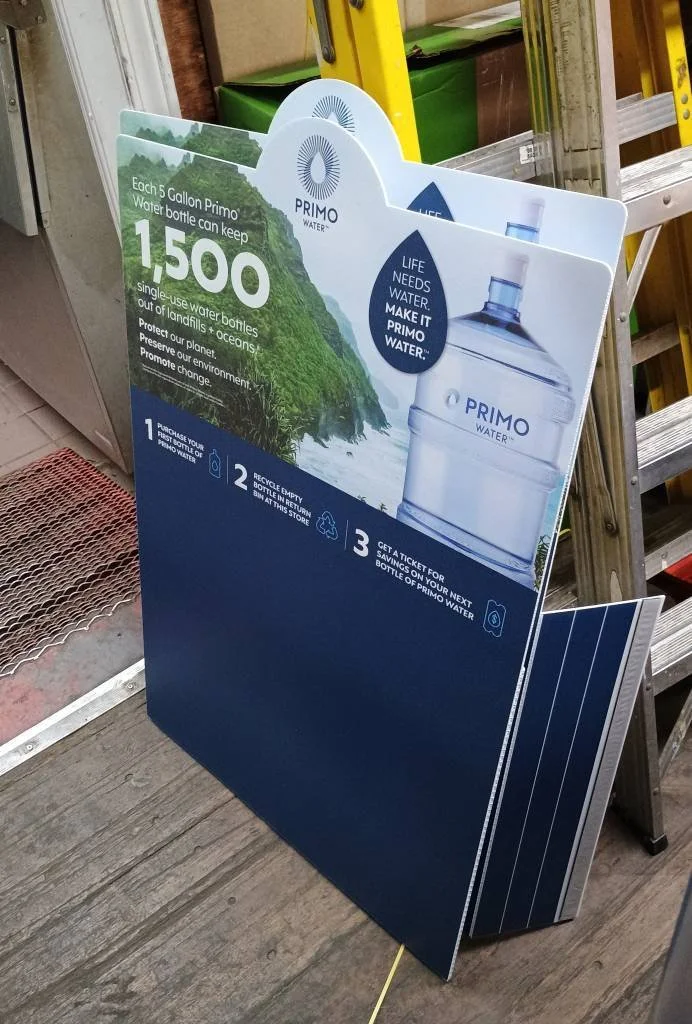
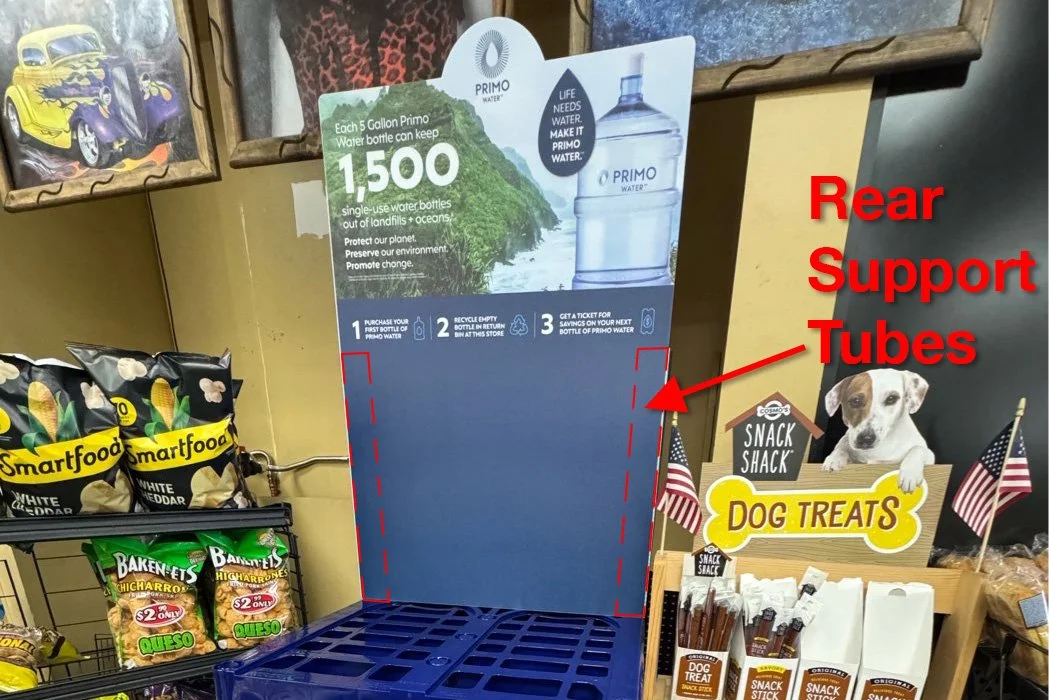
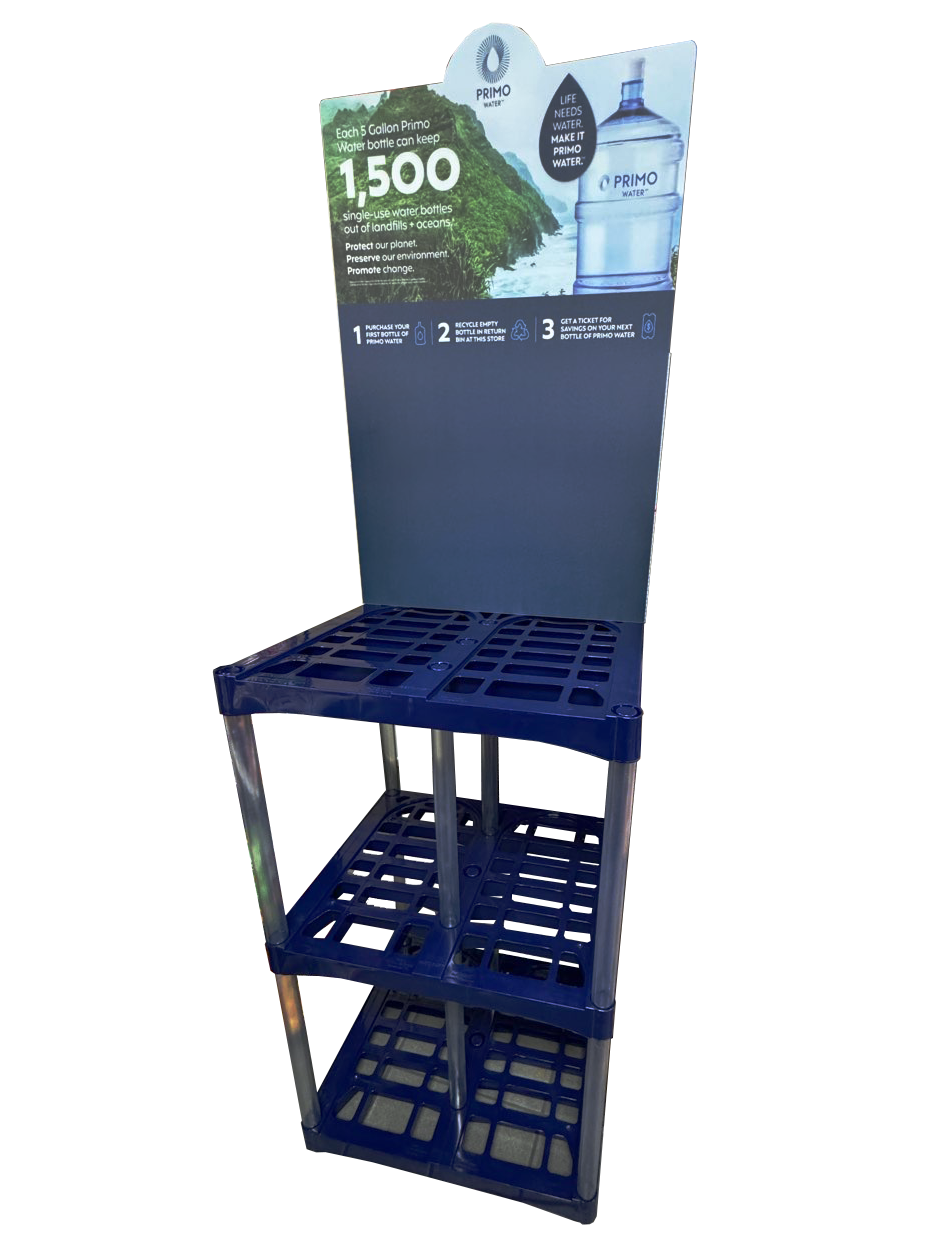
3: Find the printed assembly instructions inside the display box and assemble the display following the instructions. Important: Do not install the 4th platform base at the top as seen in the printed instructions, only install 3 platform bases (see photos below). The 3rd platform base (the top) should only have the two rear support tubes installed on top of it, which is used to attach the signage.
4: Unpack the signage from the box. There are “wings” on both sides of the sign. Remove the backing off the tape strip, then fold them inward to attach the tape to the backside of the display. This will create two “slots” on the back of the sign use to install it on the display.
5: Install the sign by inserting the two “slots” you just made over the top of the rear support tubes.
6: Slide the 12-Count display into position of the Install Location.
7: If there are existing PrimoWater displays with new water jugs, place a couple five-gallon jugs from the existing display over to the new display that you just installed.
8: Clean up the site and return the boxes and any trash to the Receiving Area. Dispose of the 4th platform base and extra support tubes that weren’t used. You will then need to return to the install location to complete Step 5 (Install Verification Form).
Return to main Installs page to continue instructions.