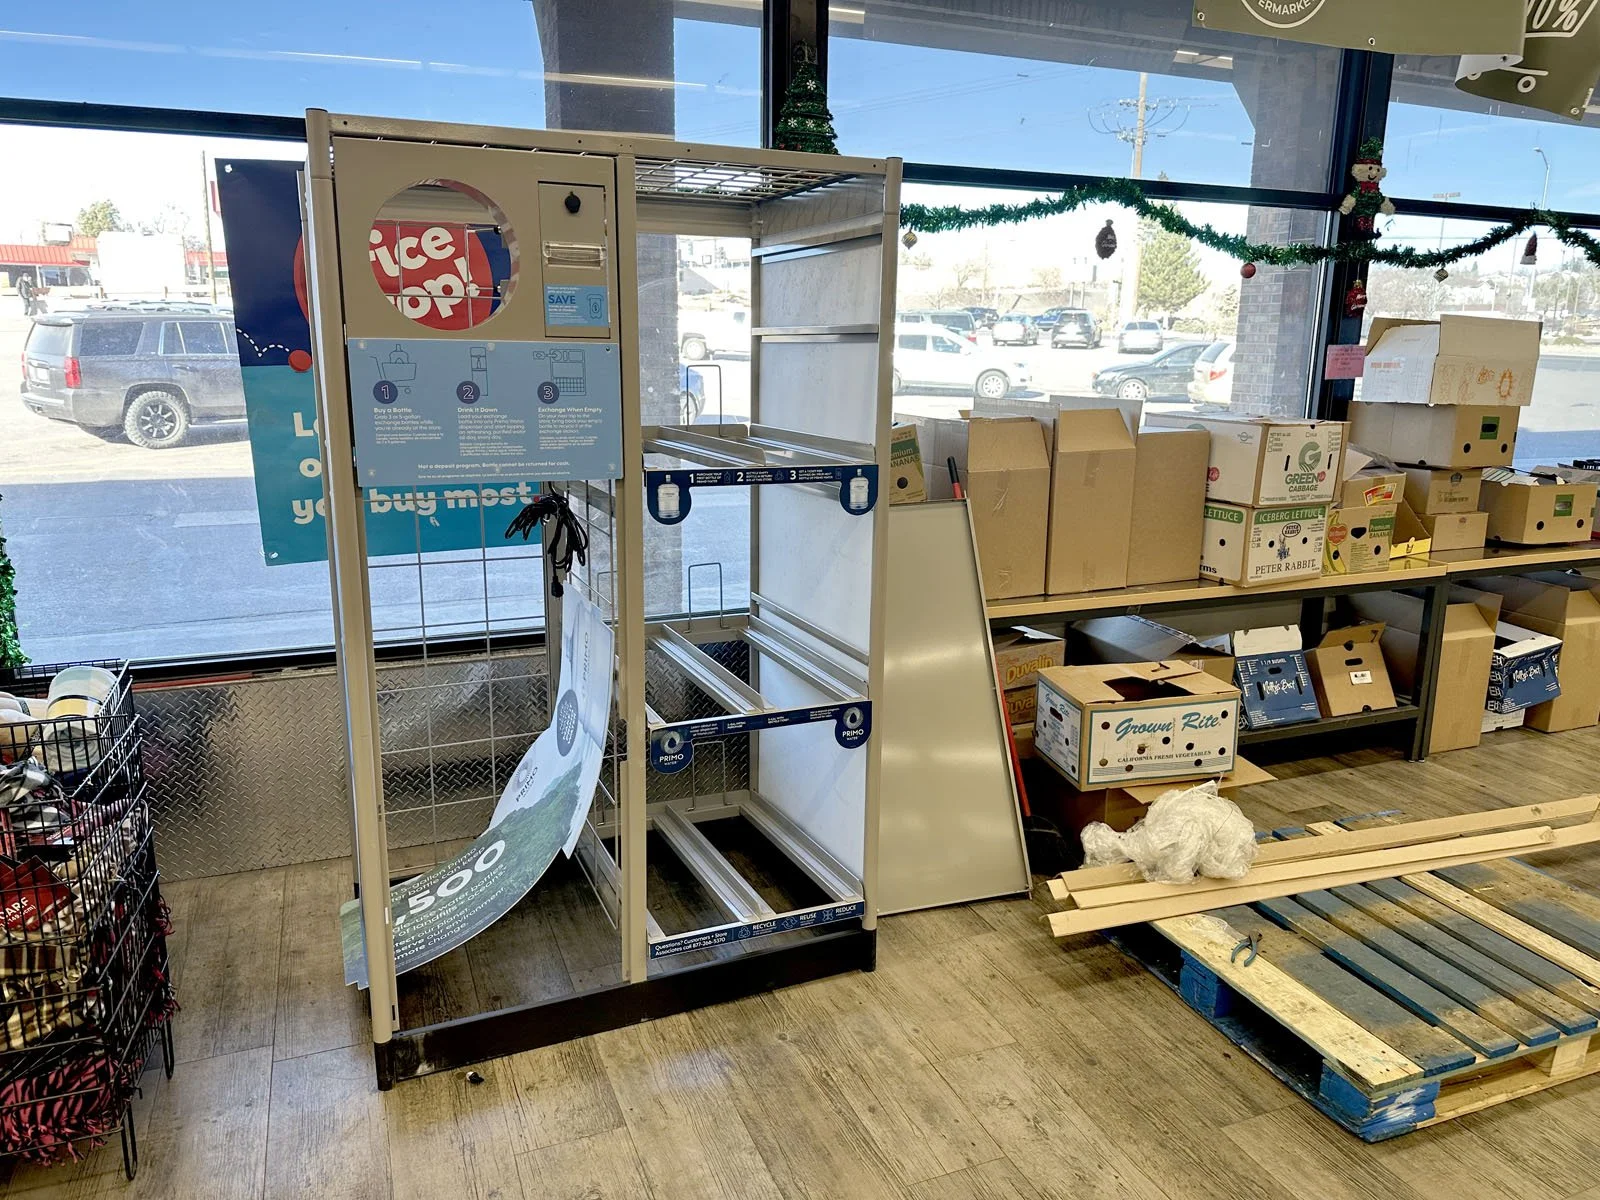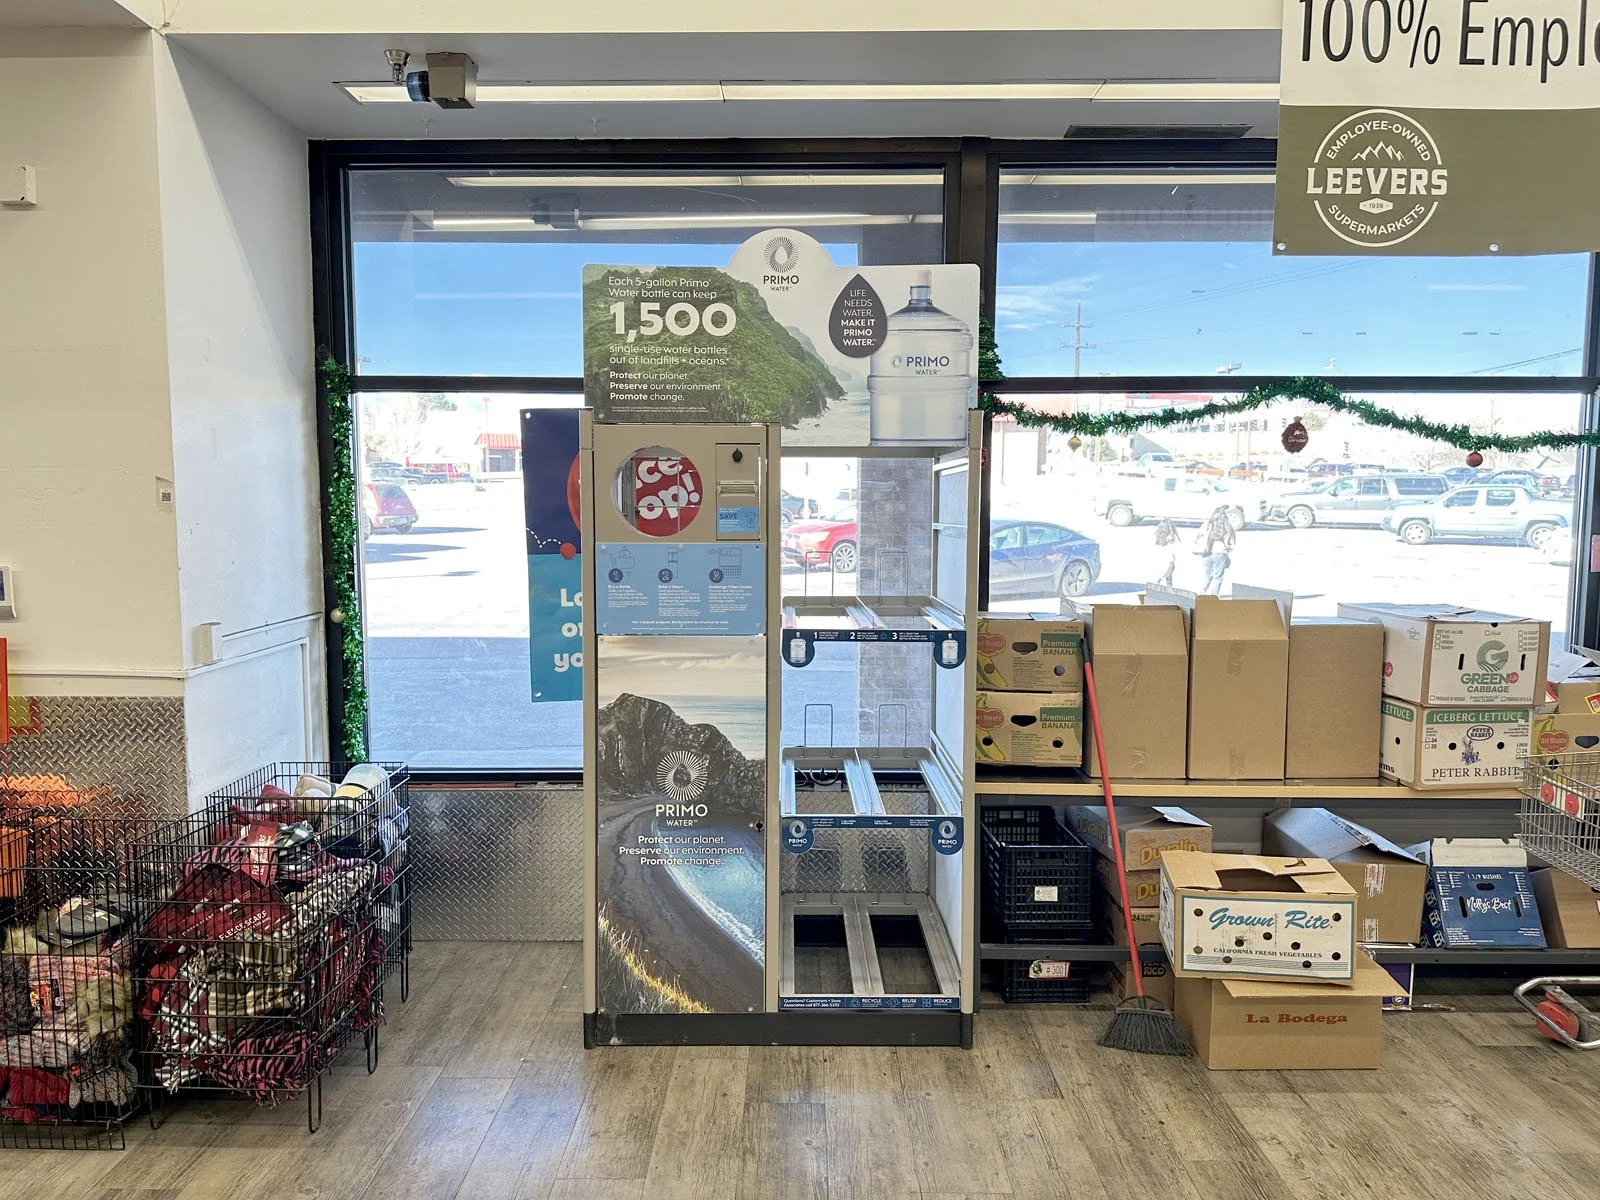
Combo Unit

STEP 3. Installation of Combo Unit
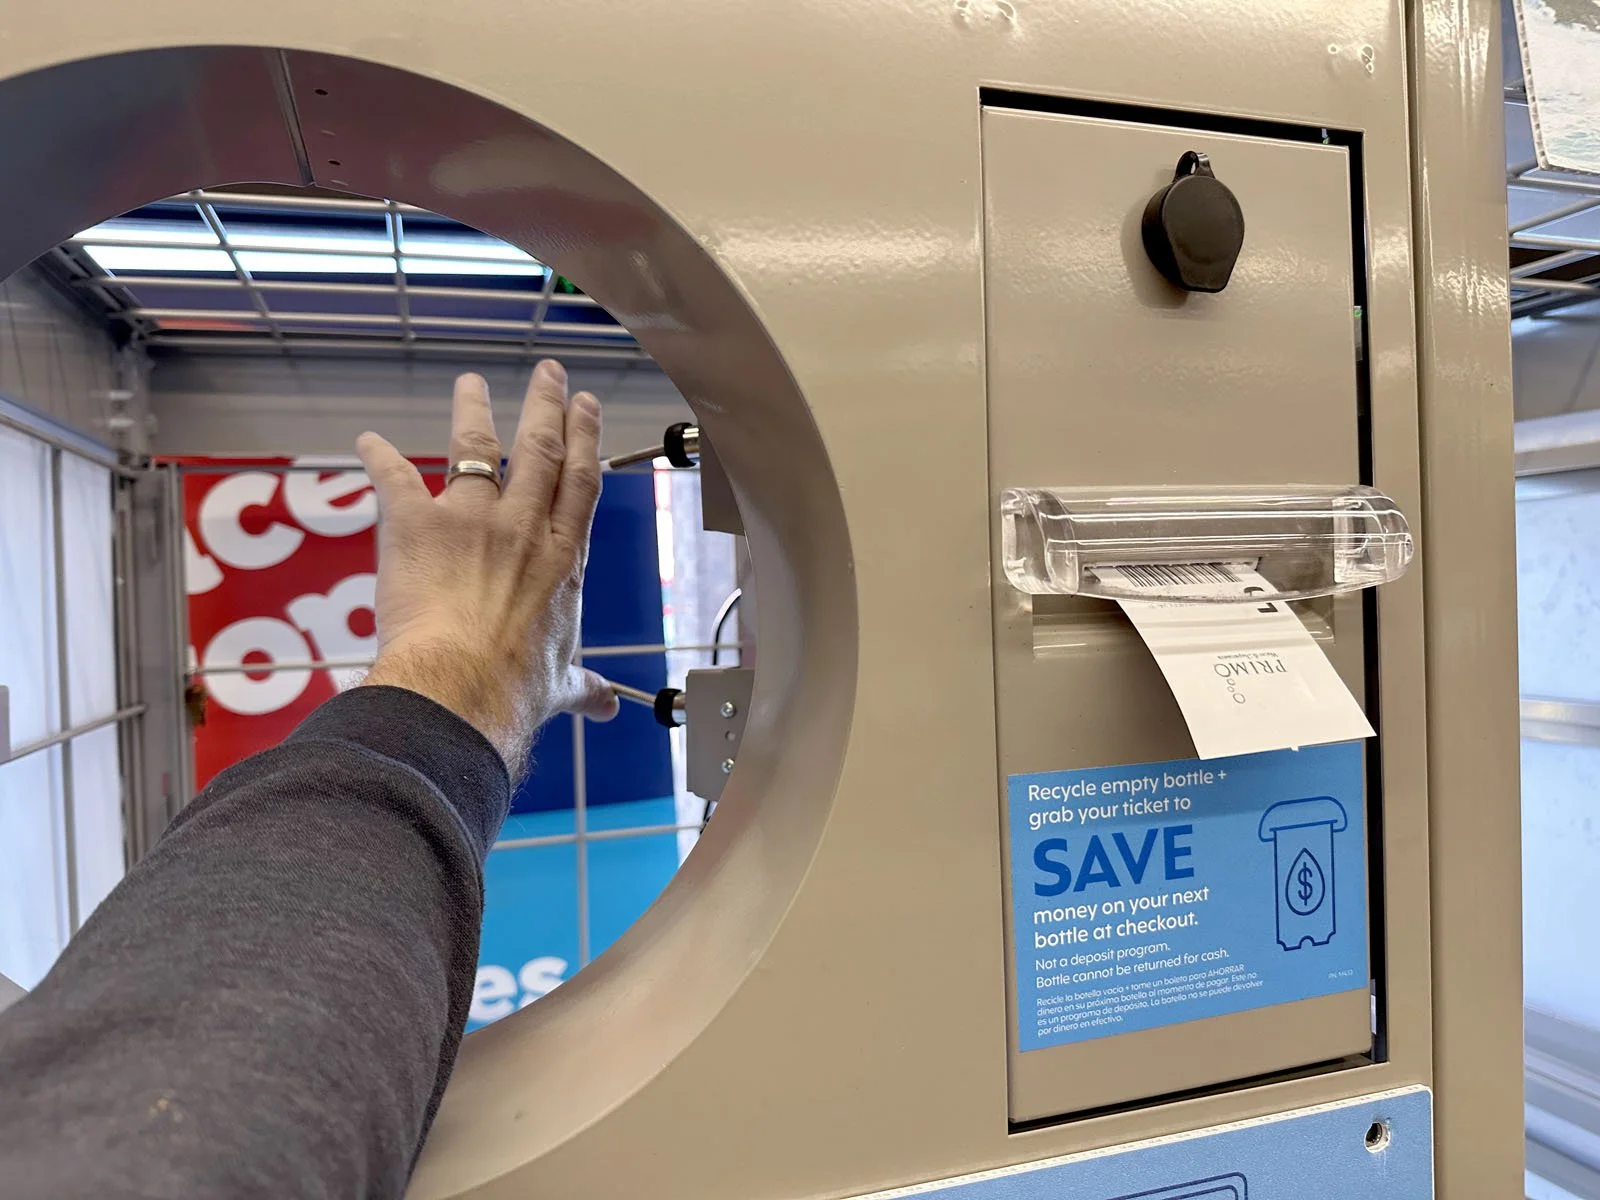
*Some models have a QR code on the front top sign instead of a printer. If this type of unit was delivered, you do not need to find an outlet.
1: Check the Scope of Work under Buyer’s Custom Fields in your Work Order. If something needs to be moved, do so now (ask a store employee for help if it’s merchandise). If an existing PrimoWater display needs to be moved, you will need to remove all water jugs in order to shift it. The store may receive a unit with different Primo Brands (ie. Poland Springs, Zephyrhills, Deer Park, etc). All instructions are exactly the same regardless of the branding.
2: Slide the display off of the pallet in front of the install location. Move the pallet and pallet jack out of the way of customer traffic while you continue to work.
3: Using a box cutter, remove the plastic wrap from the display.
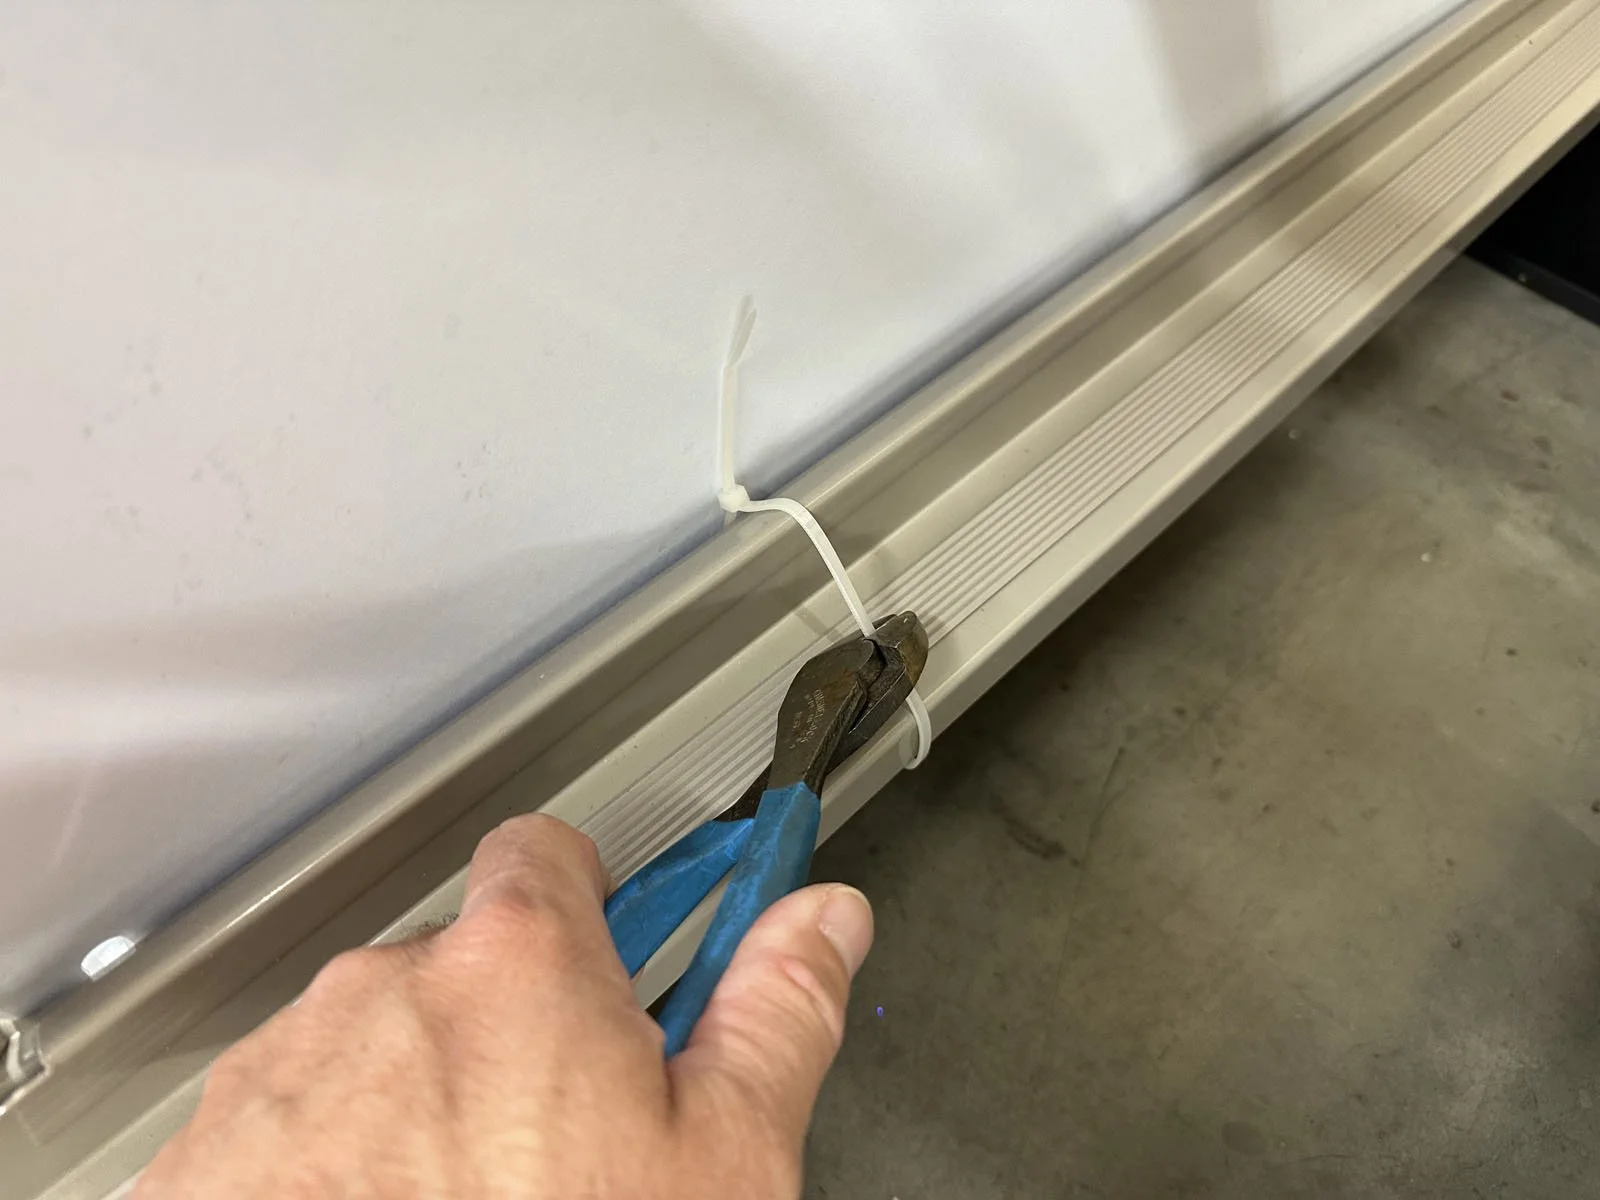
4: Using wire snips, remove all zip ties from the interior rails.
5: Attach the header to the front top bar using the plastic clips (found in bag shipped inside the display) and aligning the holes.
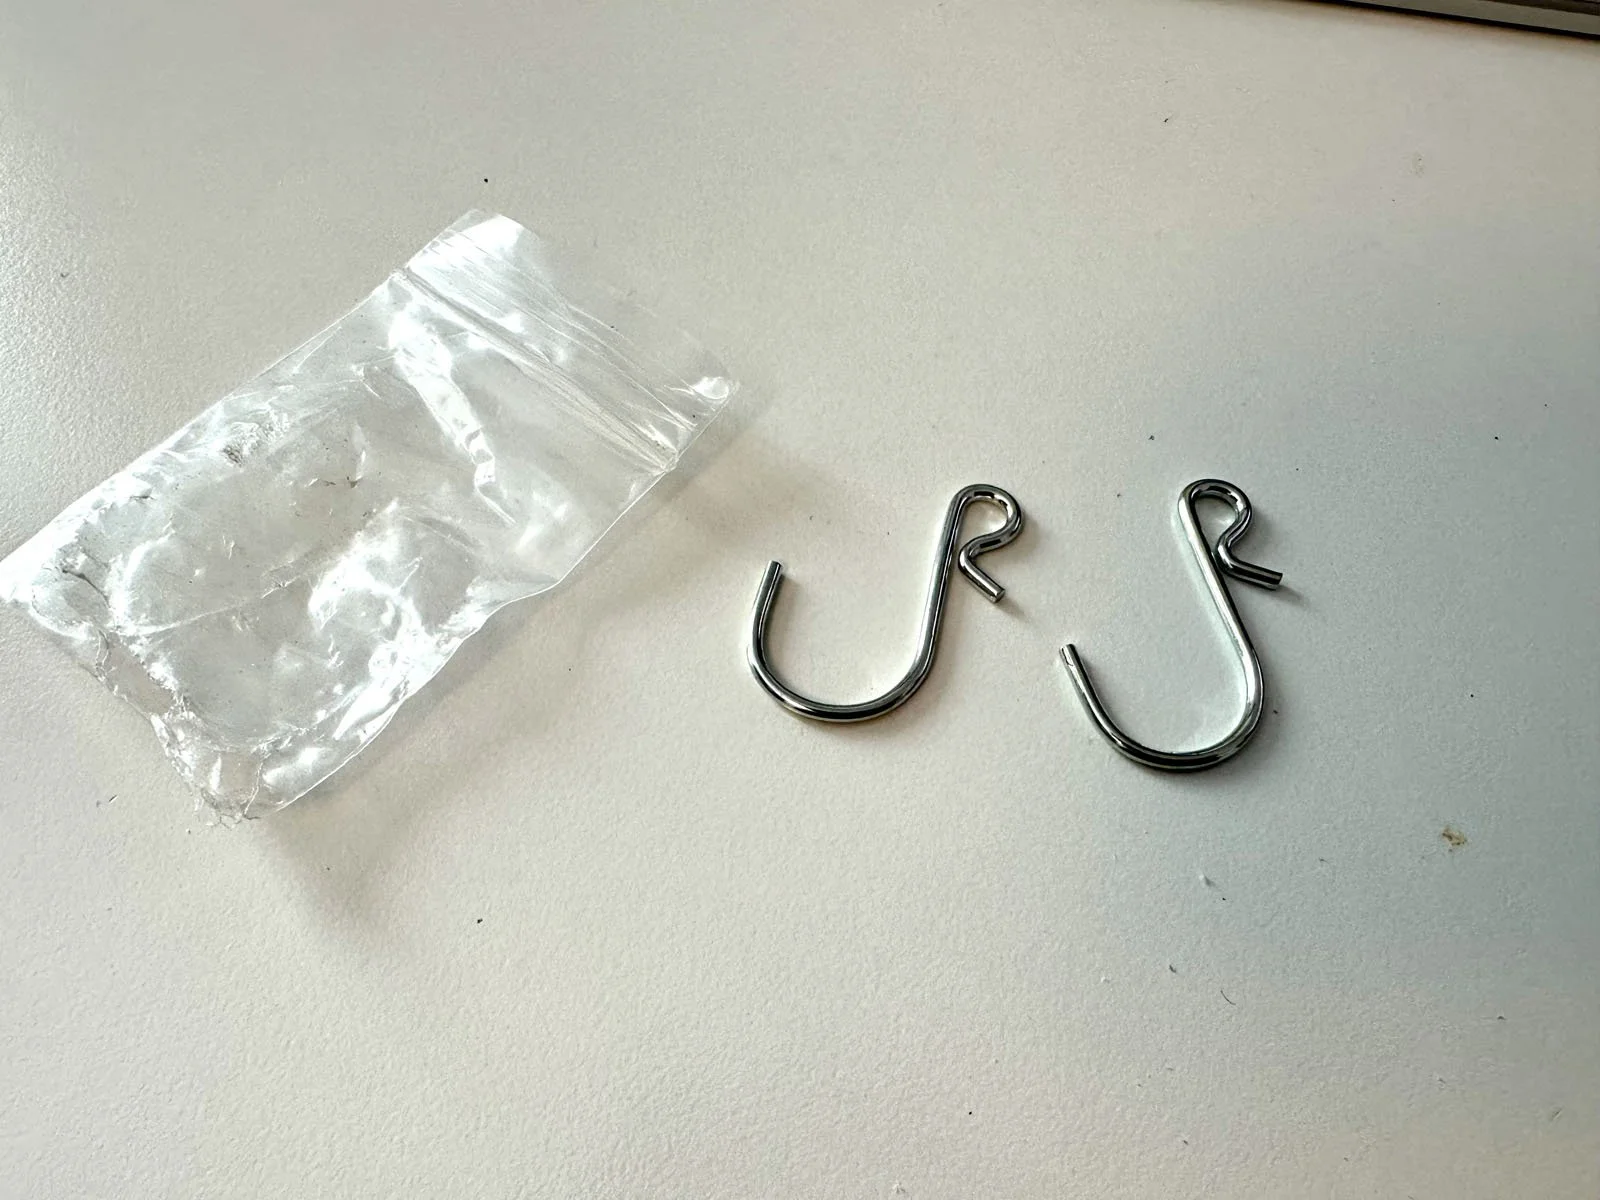
6: If metal clips were shipped in a small bag inside the unit, hang the clips from the ceiling of the unit on the wire grid in order to guide the power cable from the printer to the back of the unit (only applies to units with printers).
7: Confirm the front door is closed with the latch shut.
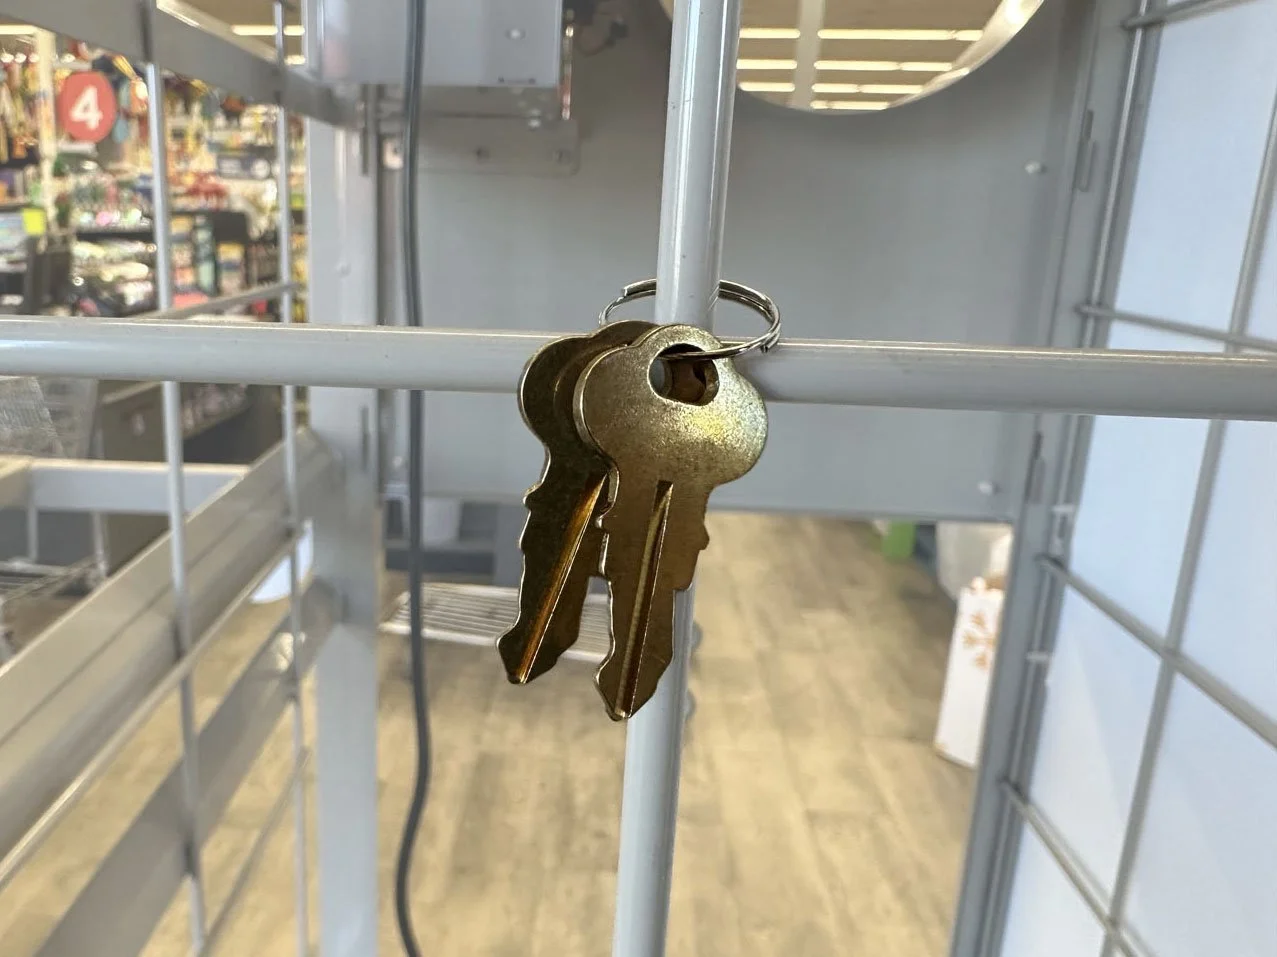
8: If a set of small brass keys were shipped in a small bag inside the unit, give the keys to Customer Service or Manager for them to keep (only applies to units with printers).
9: Slide the unit into position of the Install Location.
10: Plug the power cable into an electrical outlet (only applies to units with printers). The outlet needs to be within 10’ of the unit.
➡ New models of the Combo units are being shipped without printers and have a QR code on the signage instead. These models do not have a power cable and no outlet is needed.
11: From the front of the unit, place your hand inside the return slot and press the two metal bars (actuators) at the exact same time and a receipt will print out. Keep this receipt to take a photo of it in your installation form (only applies to units with printers).
➡ QR code models can skip this step.
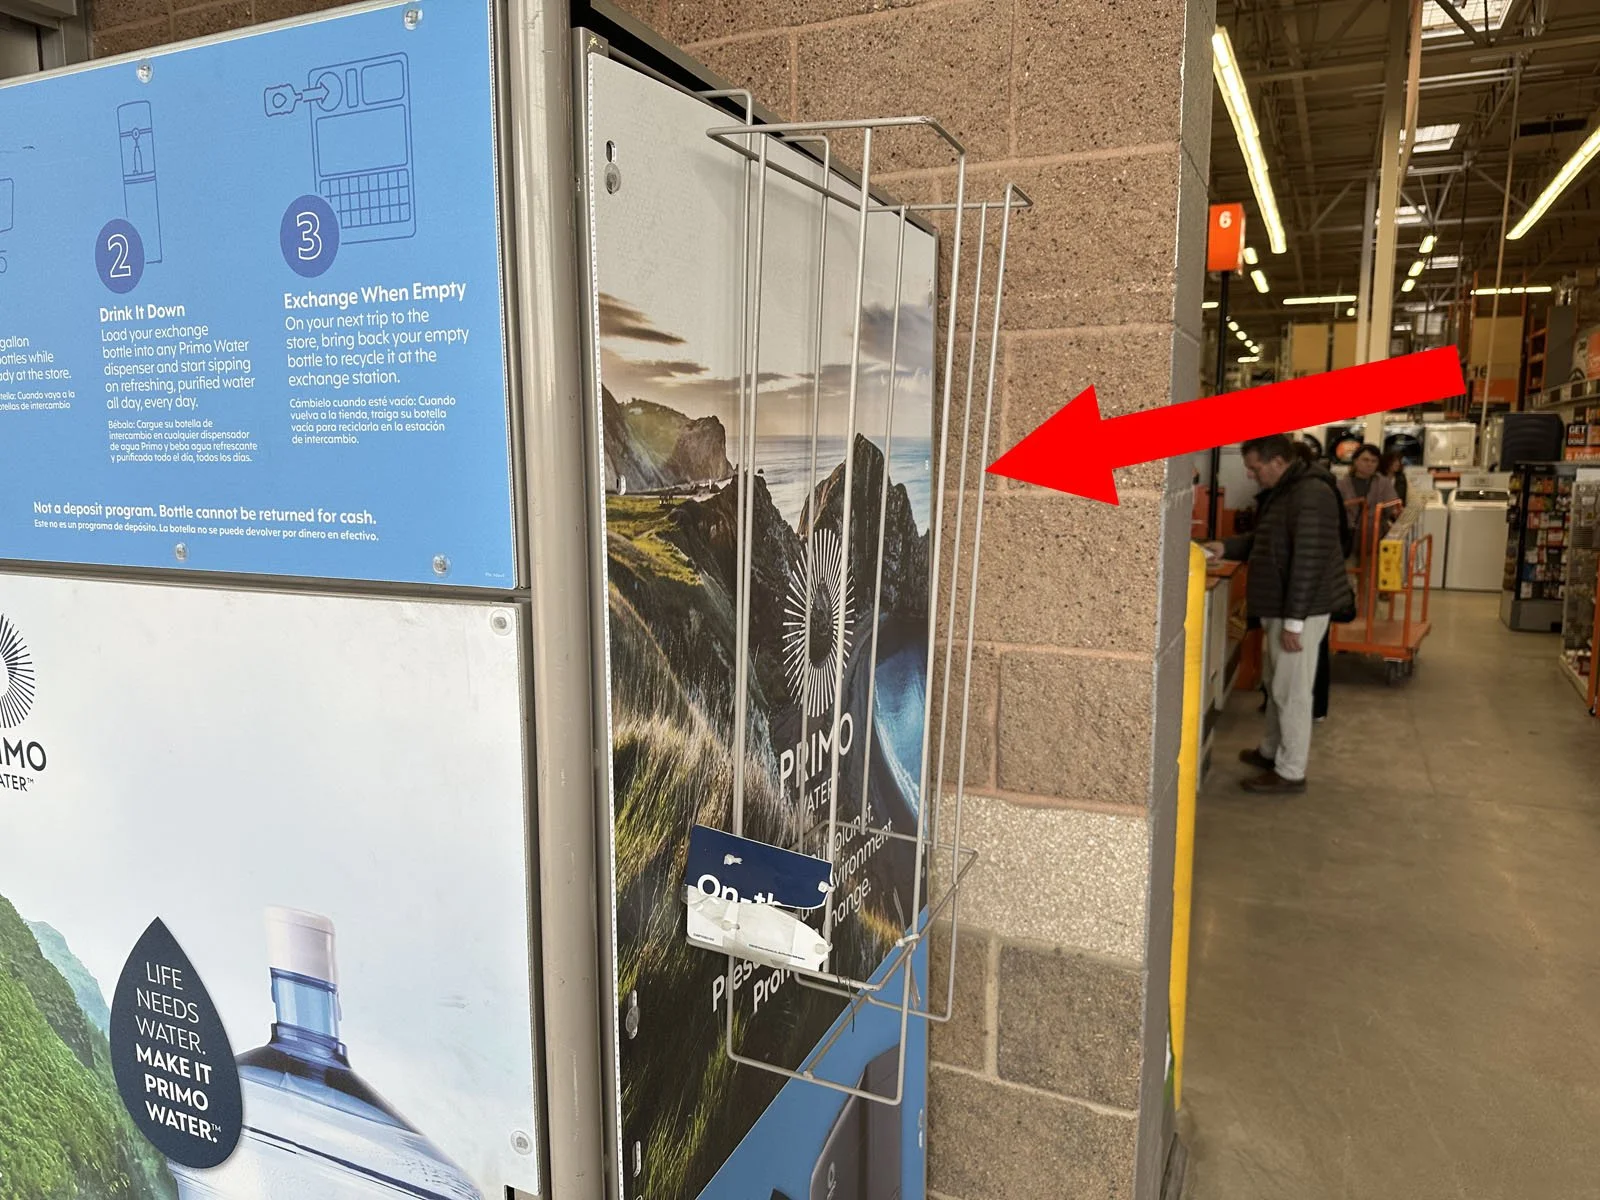
12: Install a Pump Rack or Pricing Signage if included in the shipment.
➡ Pump Rack: a wire basket to be hung on the side of the display.
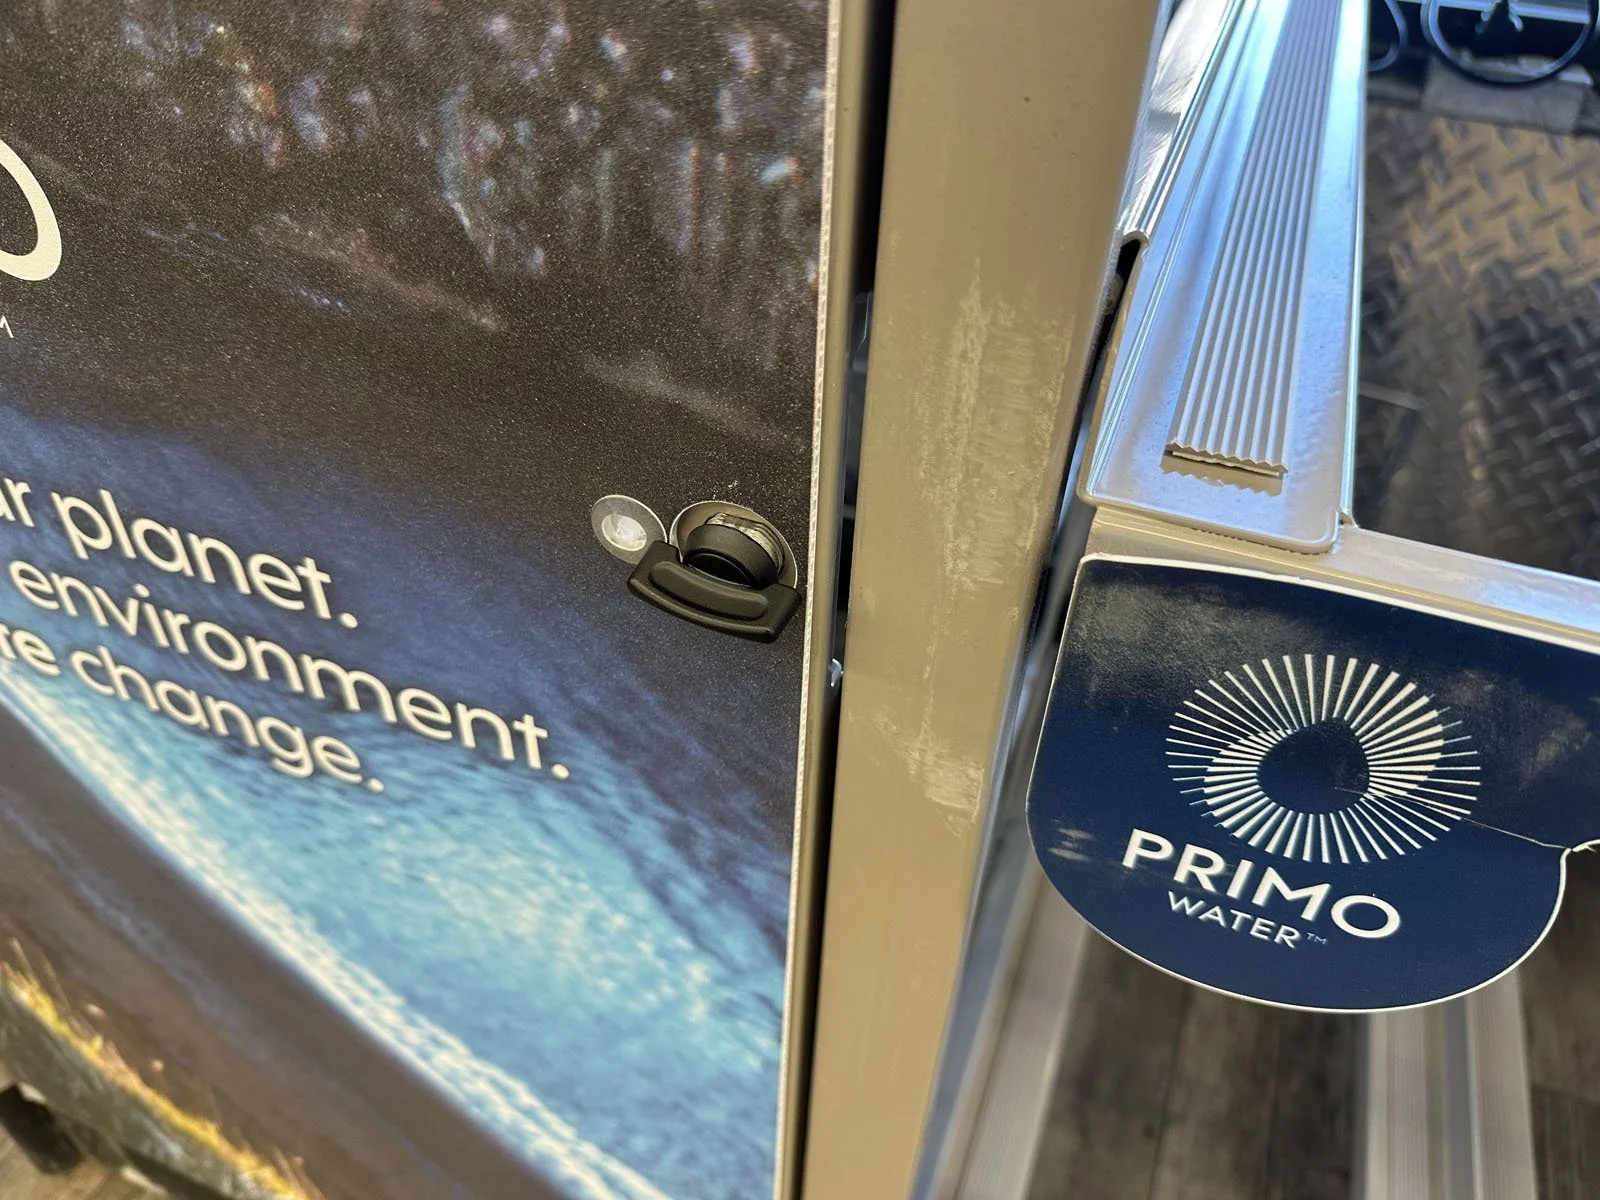
➡ Pricing Signage: stickers with pricing to be placed in bottom right corner of the header (see photo).
13: Clean up the site and return the pallet and pallet jack to the Receiving Area. You will need to return to the install location to complete Step 5 (Install Verification Form).
Return to main Installs page to continue instructions.