Install 12-Count Header
Provided in Shipment: 12-Count Header
Tools Required: None
1: Open the FastField mobile app (Apple or Android) and find the form specific to your store. Your username and password can be found in Field Nation under the Buyer’s Custom Fields. You will use the mobile app to take before, during and after photos while completing the scope of work.
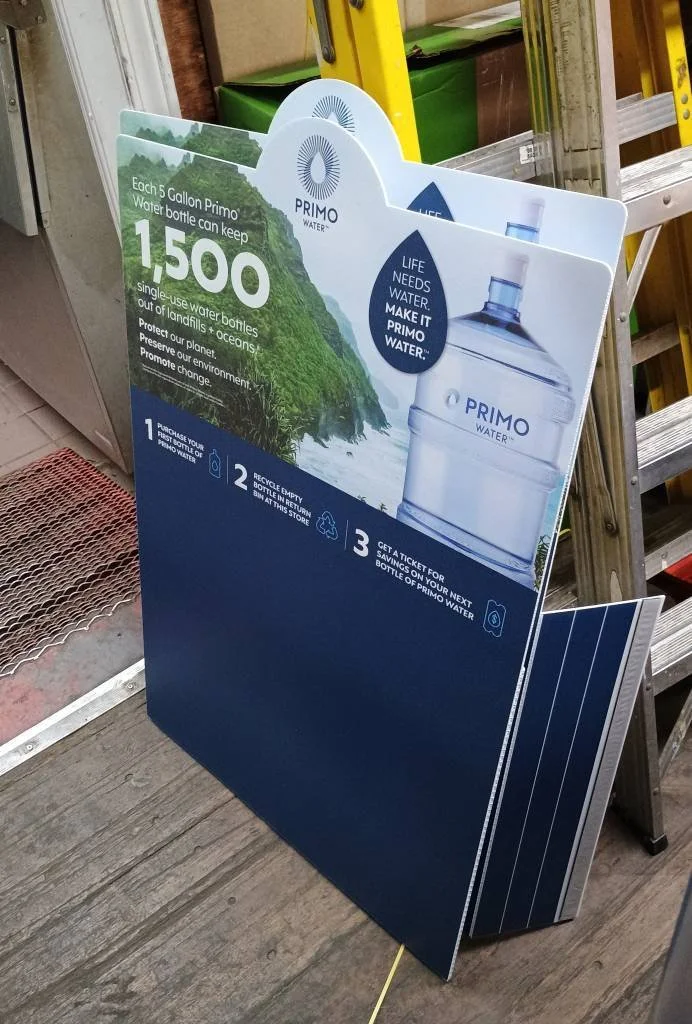
2: Find the Primo Brand 12-Count Display (typically along the interior front wall or an endcap) and take a BEFORE photo 📷 in the mobile app of the display prior to starting any work.
➡ There are many different brands of signage by Primo Brands (ie. Primo Water, Poland Spring, Deer Park, Arrowhead, etc). All instructions are exactly the same regardless of brand type that was sent to you.
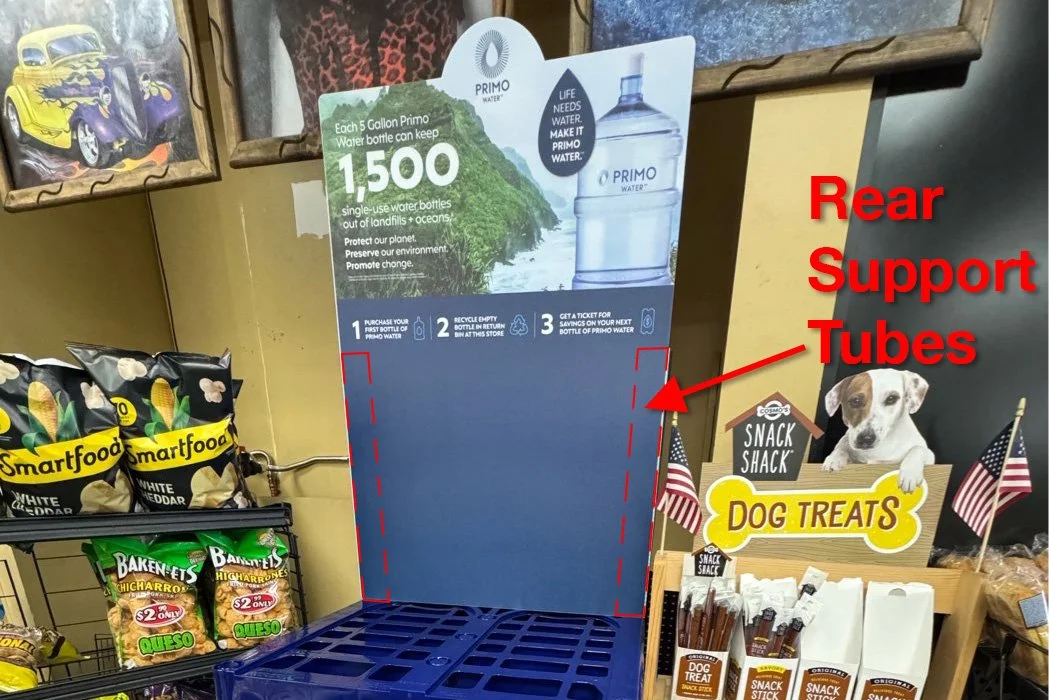
3: Attach the 12-Count Header. There are “wings” on both sides of the sign. Remove the backing off the tape strip, then fold them inward to attach the tape to the backside of the display. This will create two “slots” on the back of the sign use to install it on the display. Install the header by inserting the two “slots” you just made over the top of the rear support tubes.
4: Take a DURING photo 📷 showing a close up of the header installed.
5: Clean up the area around the display and dispose of any trash or packaging.
6: Take an AFTER photo 📷 while standing 15’ back to show the overall display, then finish the form in FastField.