
Printer Swap
Provided: New printer shipped direct to store, Customer Service has padlock key.
Tools Required: 3/8” socket wrench, 6” socket extension.
1: Check-in with the store manager on duty. The store has received a package from PrimoWater with a new printer in the box. Have the manager help you find this shipment.
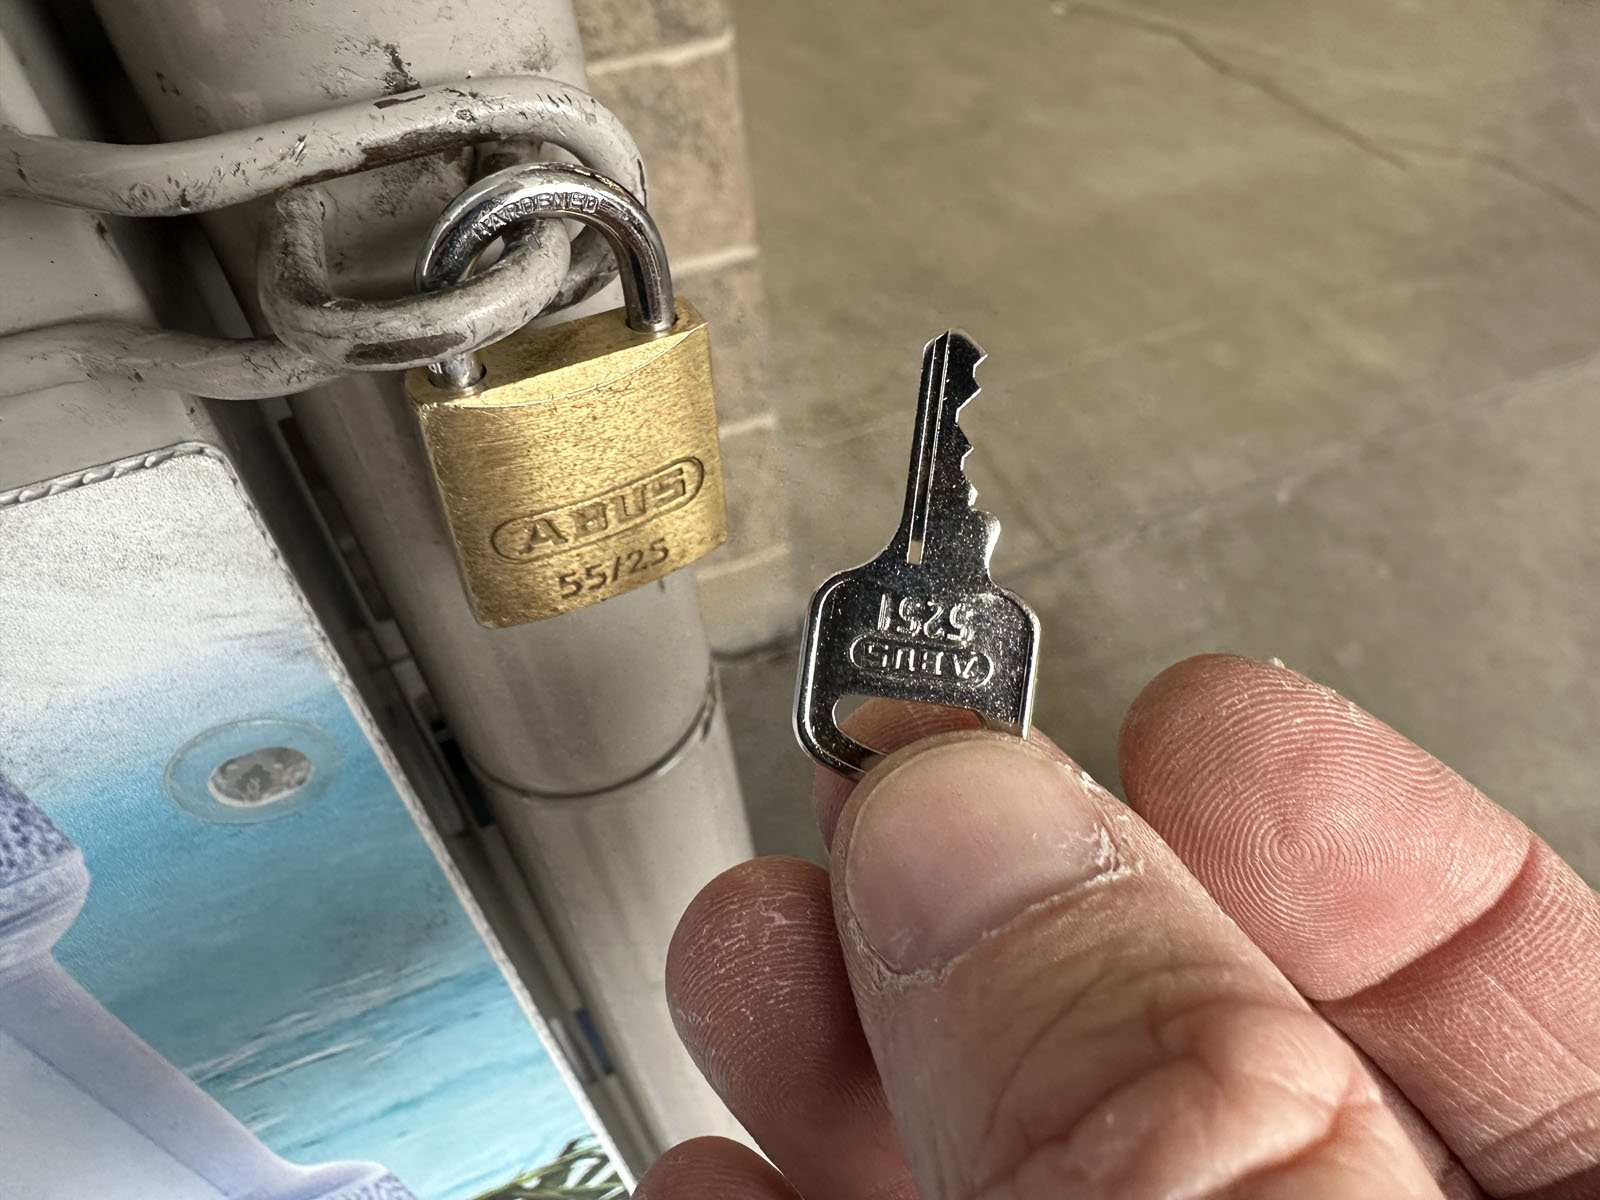
2: Go to the Customer Service desk and ask for their key for PrimoWater Return Center. This is a small, silver padlock key to open the front door. If they don’t have the key, check the Return Center next because they often are not locked or are missing the padlock.
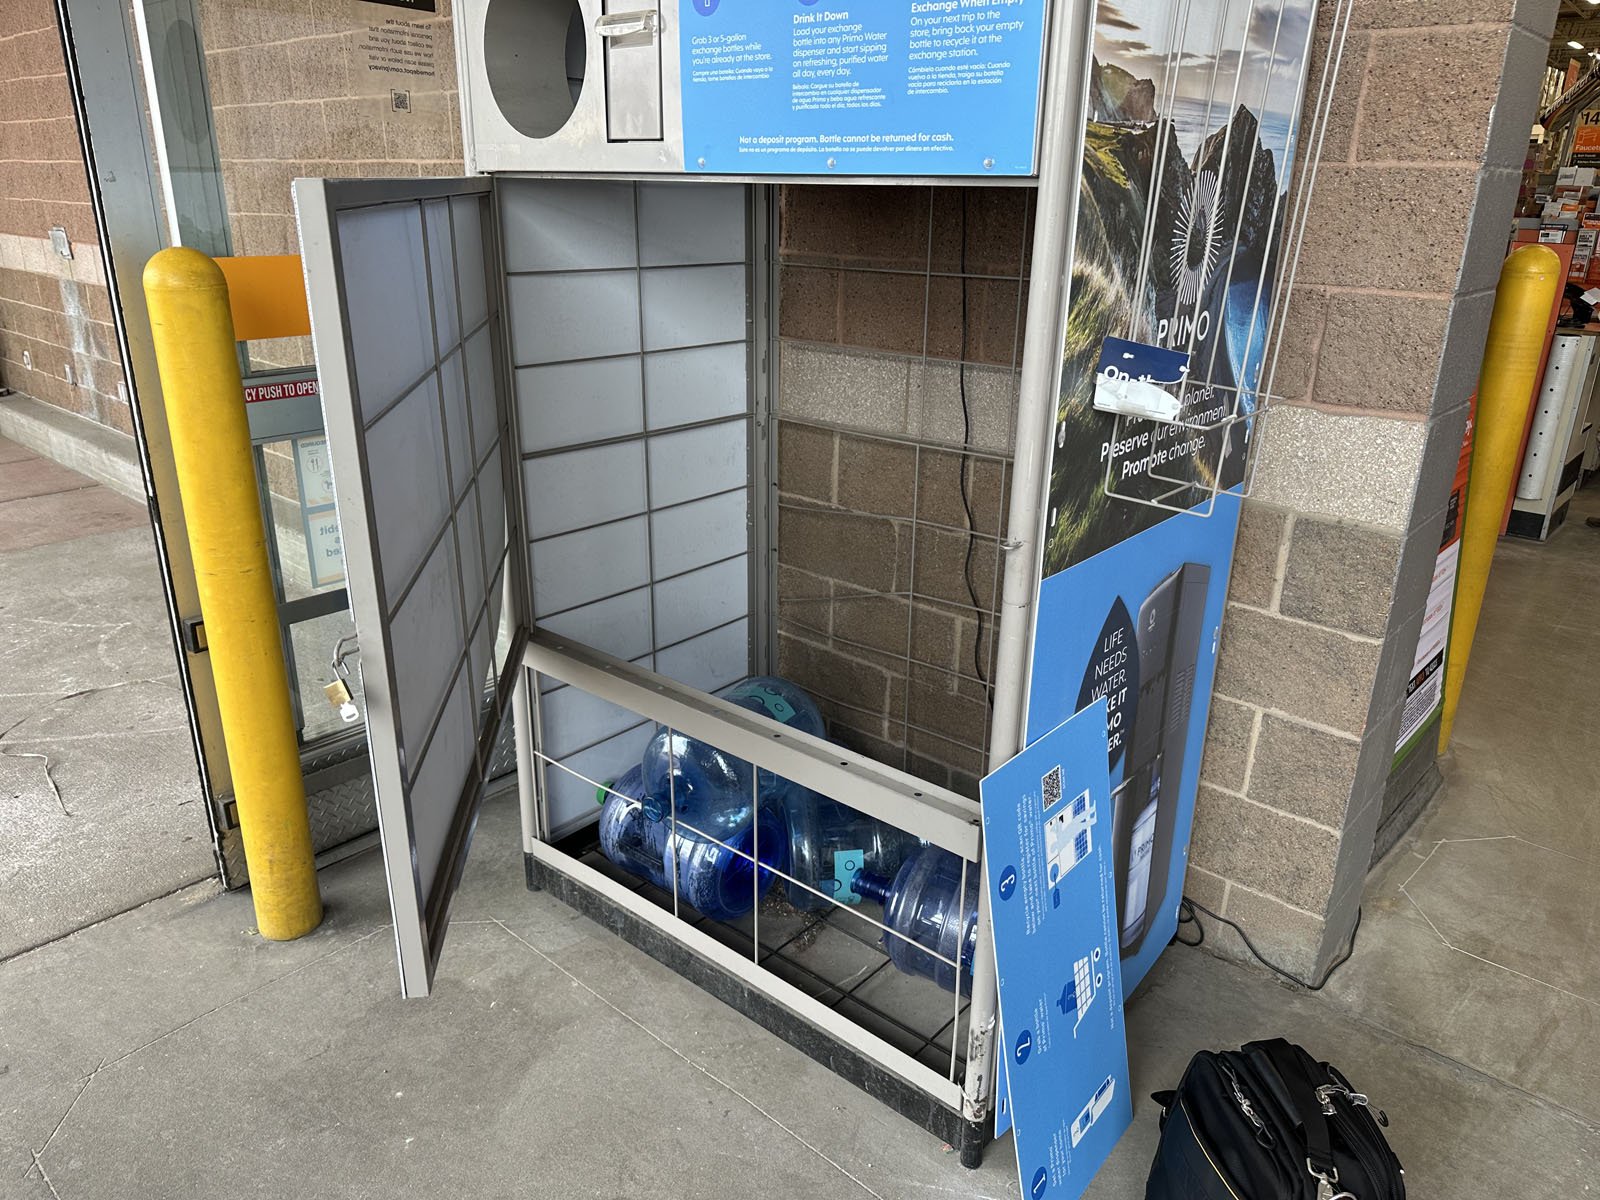
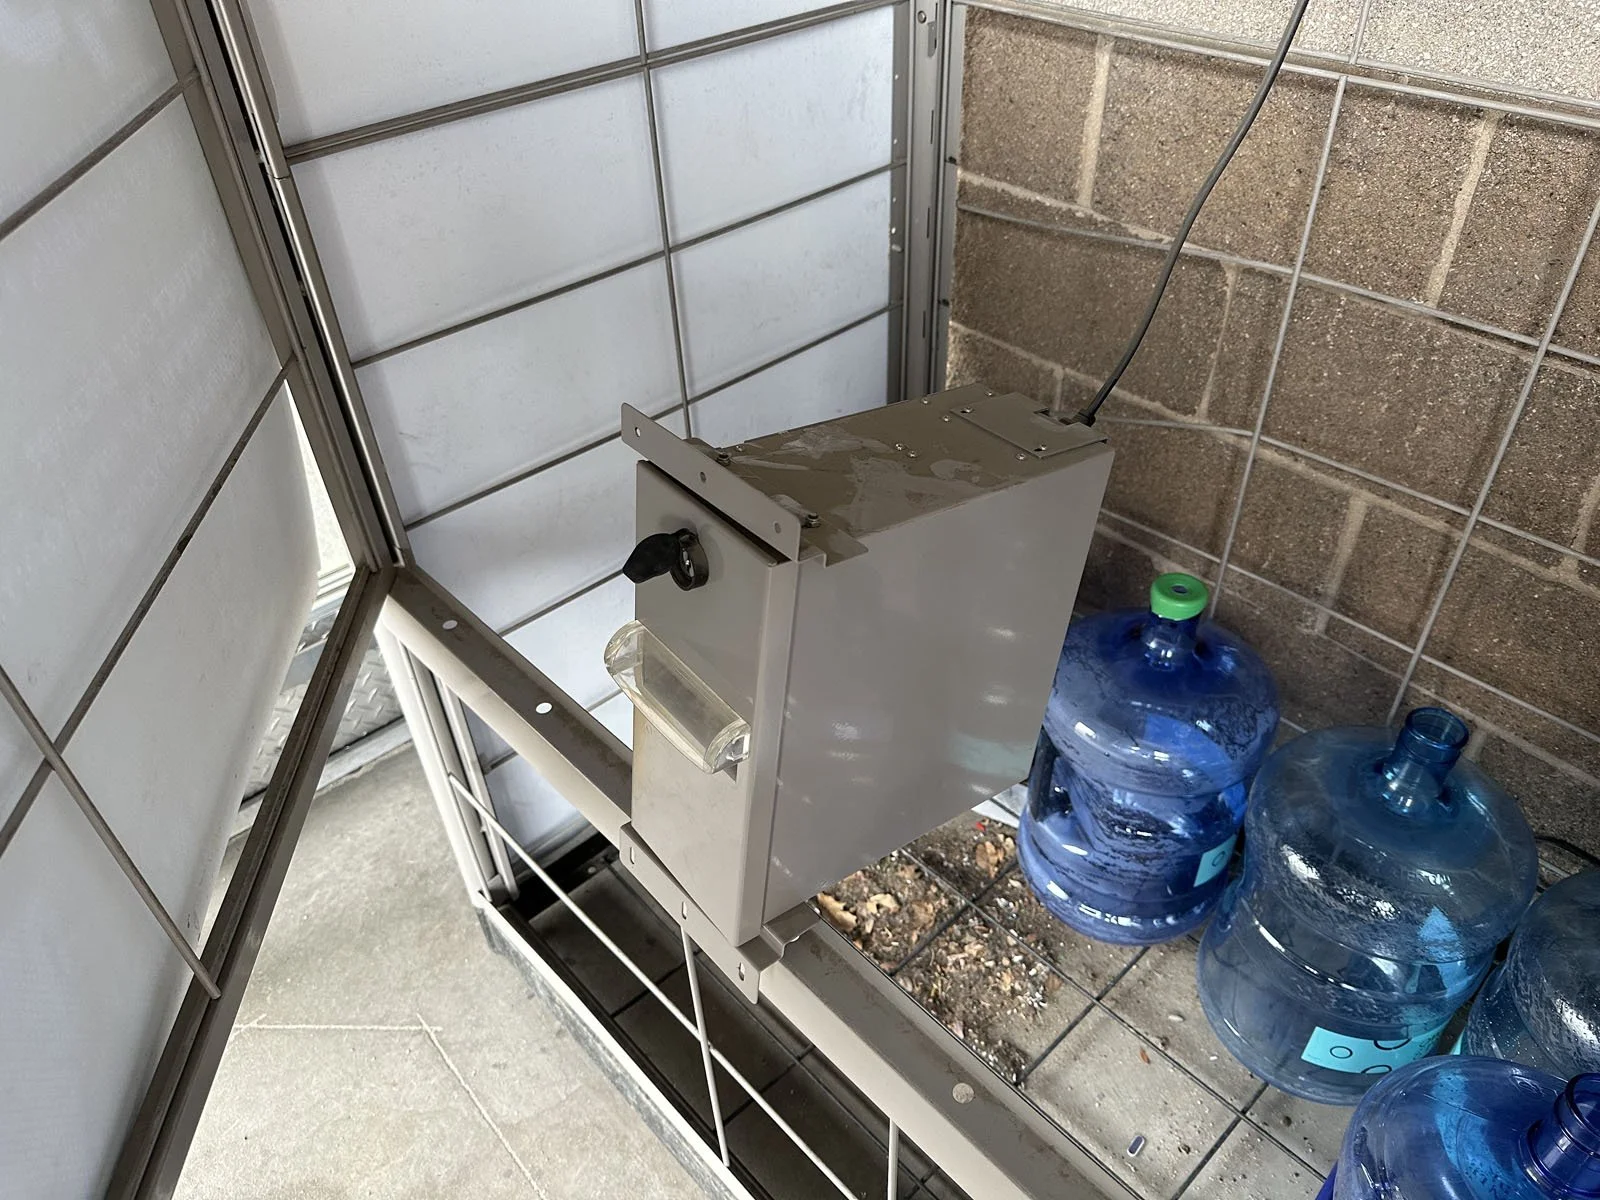
3: Bring the box and the key to the PrimoWater Return Center. Open the box and carefully remove the new printer.
4: Unplug the existing power cable from the outlet.
5: Unlock the padlock using the silver key on the Return Center door and open the door to access the existing printer.

6: From inside the Return Center, remove the 4 nuts from the mounting bracket for the printer using a 3/8 socket wrench. You’ll need a 6” extension to reach the upper nut on the return chute side.
7: Remove the entire printer with mounting bracket and the power cable and set aside. You may come across an old printer setup that has a “square chute” attached directly to the side of the printer. In this case, you’ll still remove the entire printer and square chute as one piece to dispose of (you do not need to separate them).
8: Remove the mounting brackets from the old printer, then attach them to the new printer. Tip: some new printers are shipped with mounting brackets already attached, so you may be able to skip this step.
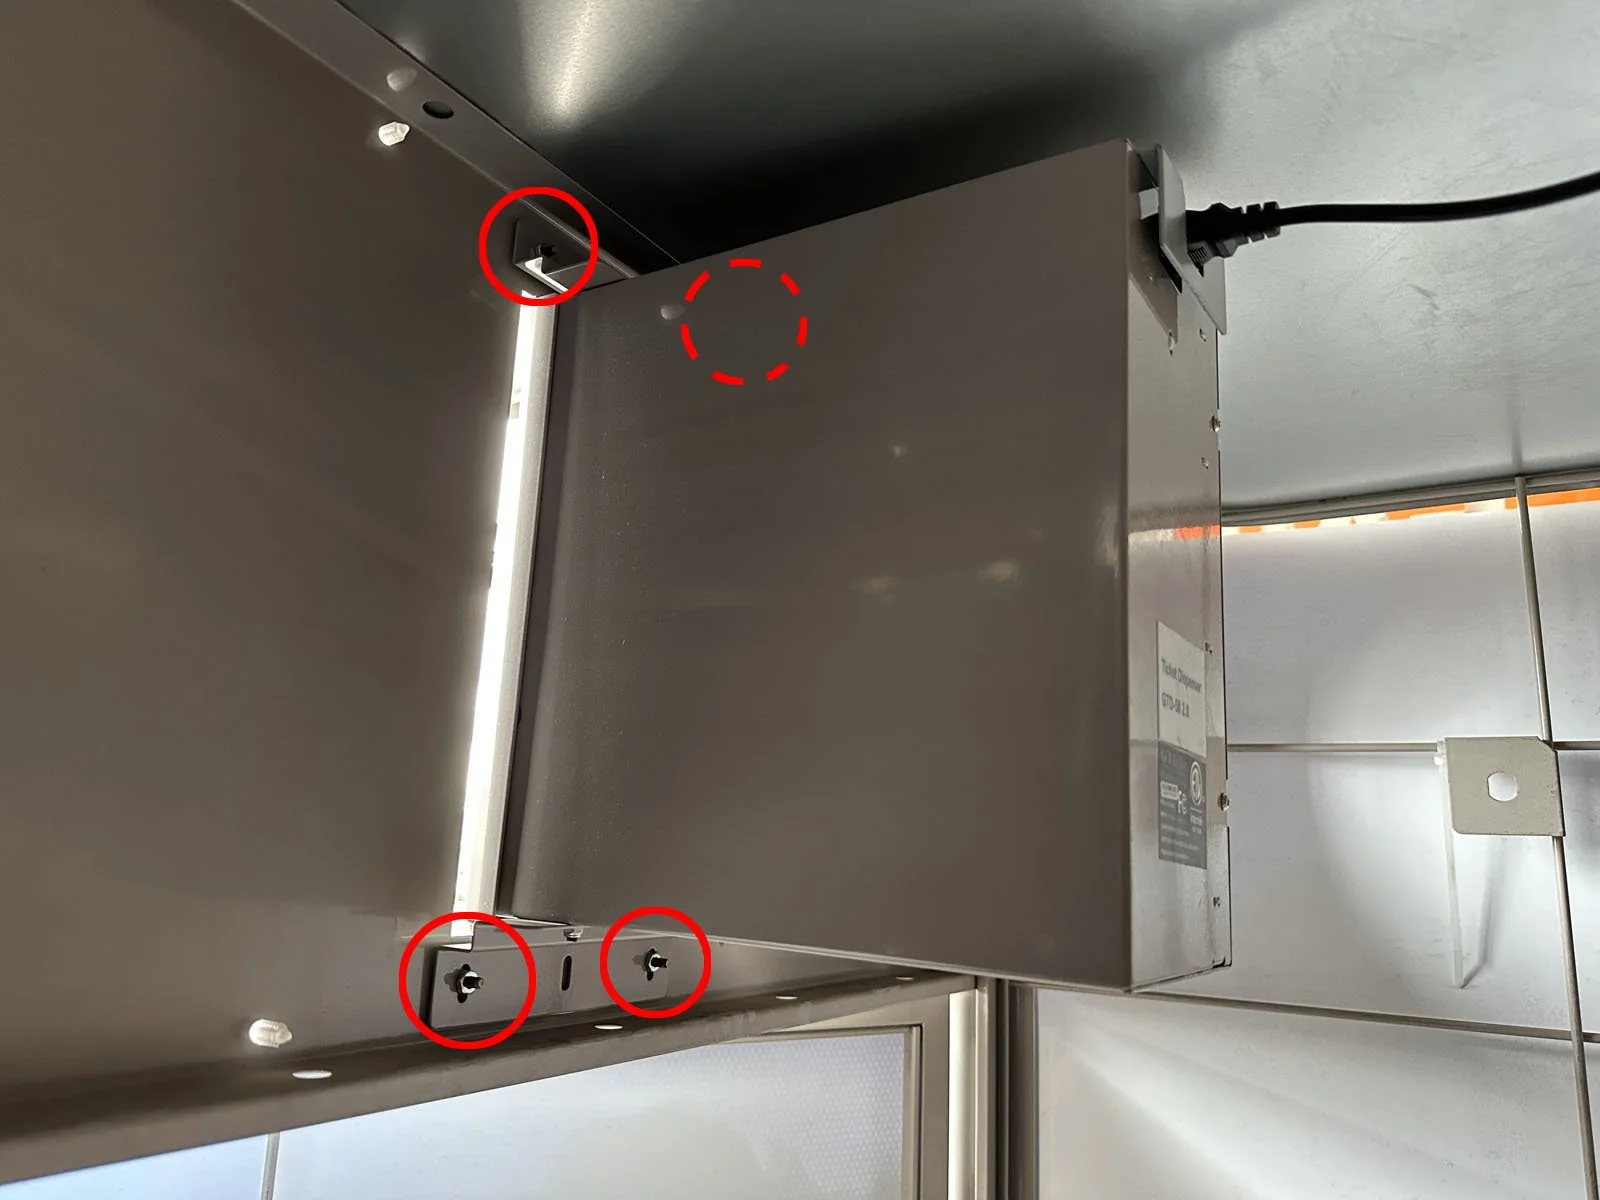
9: Install the new printer, mounting it back onto the same bolts and using the same nuts to install it.
10: Plug in the power cable for the new printer into the outlet.
11: Open the front printer door using the printer key (brass) that comes inside the box, then load the paper roll. Make sure the to follow the sticker “This way up” so the paper feeds from the top of the roll.
12: Close the front printer door and lock it shut. Put your hand into the return chute, pressing both actuators at the same time. It should now print a receipt (keep this to take a photo of it at the end).
If a receipt prints, but it’s blank, then the paper was installed upside down. Open the printer door and reverse the direction of paper.
13: Shut the Return Center front door and lock the padlock.
14: Dispose of the old printer and any packing at the store, usually done in their receiving area.
15. Complete your Verification Form in FastField mobile app (Apple or Android). Your username and password can be found in Field Nation under the Buyer’s Custom Fields.