Replace Combo Unit Signage Set & Remove Printer
Provided in Shipment: Combo Unit Signage Set (or individual pieces)
Tools Required: 3/8” socket wrench, 6” socket extension, Pliers, Rubber Mallet (optional)
1: Open the FastField mobile app (Apple or Android) and find the form specific to your store. Your username and password can be found in Field Nation under the Buyer’s Custom Fields. You will use the mobile app to take before, during and after photos while completing the scope of work.
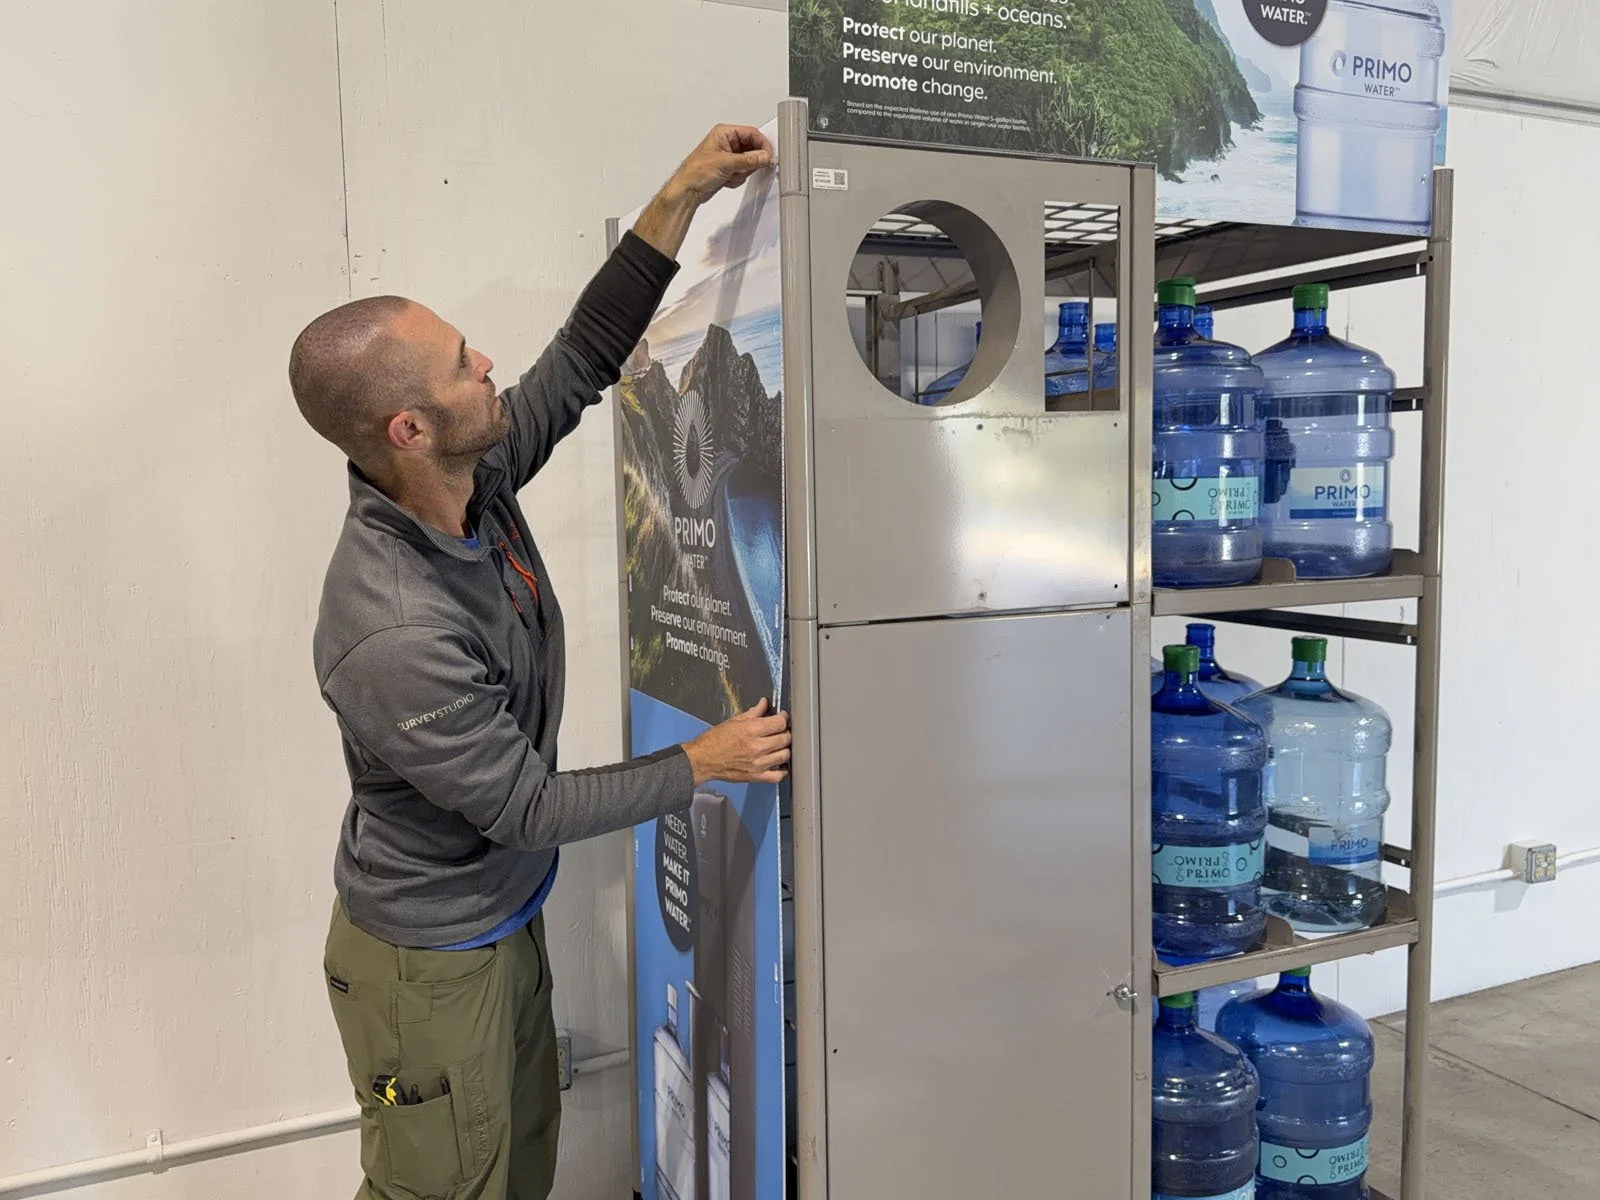
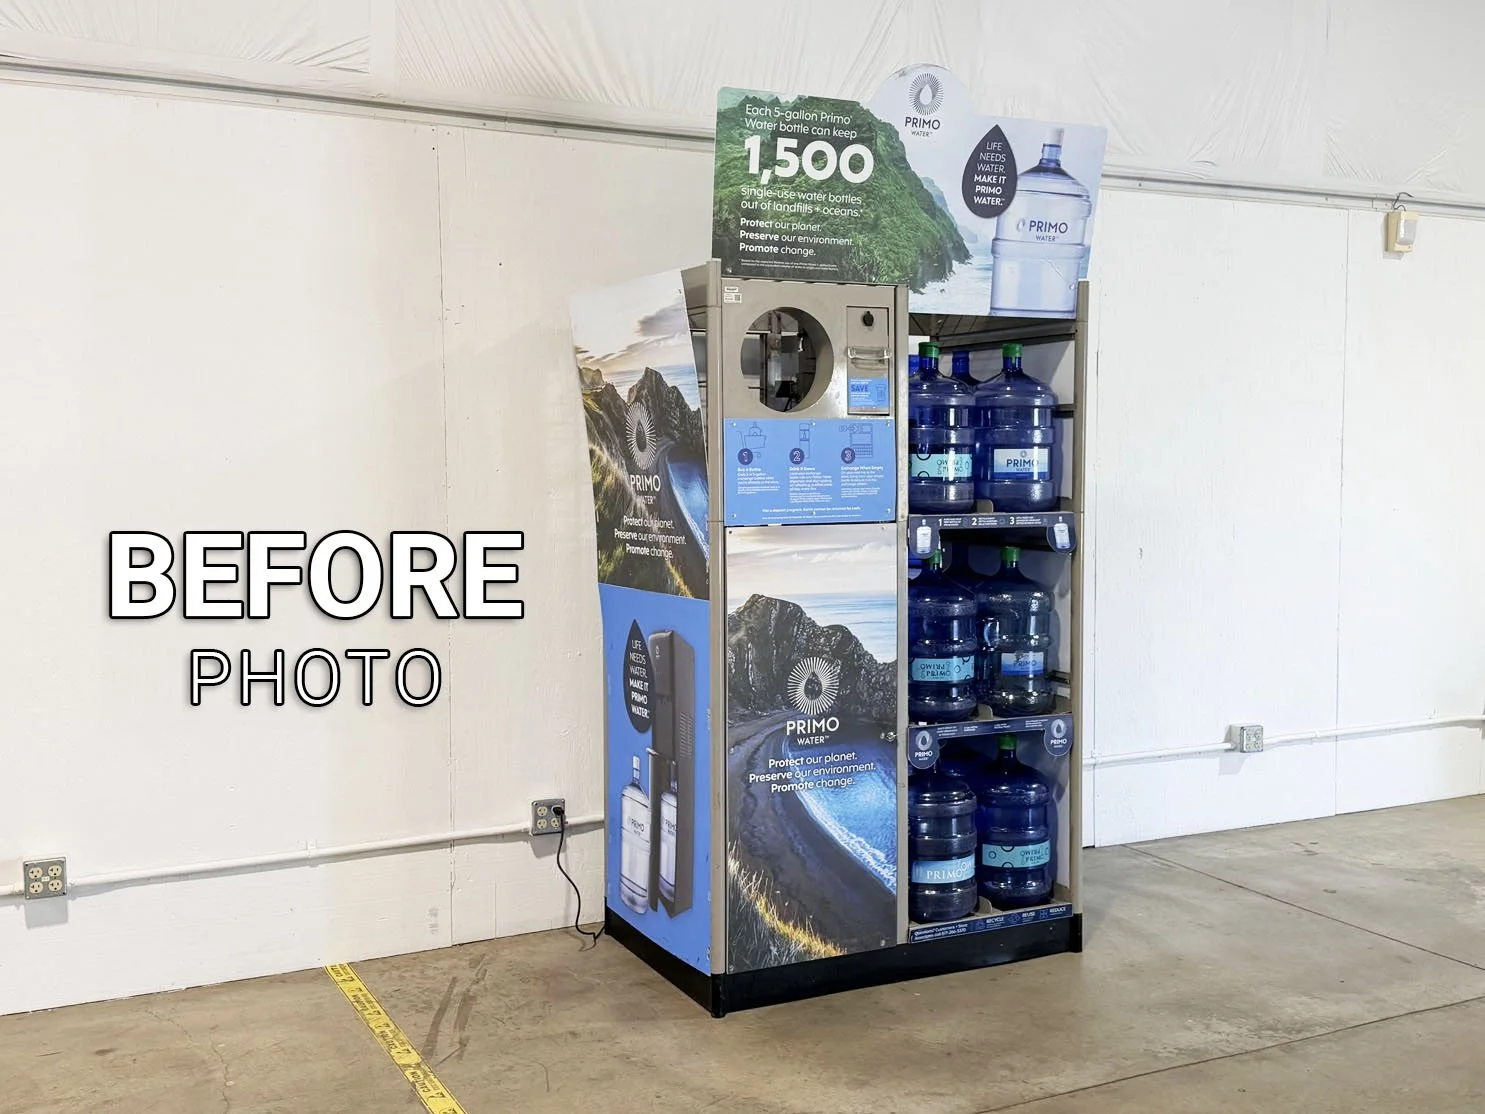
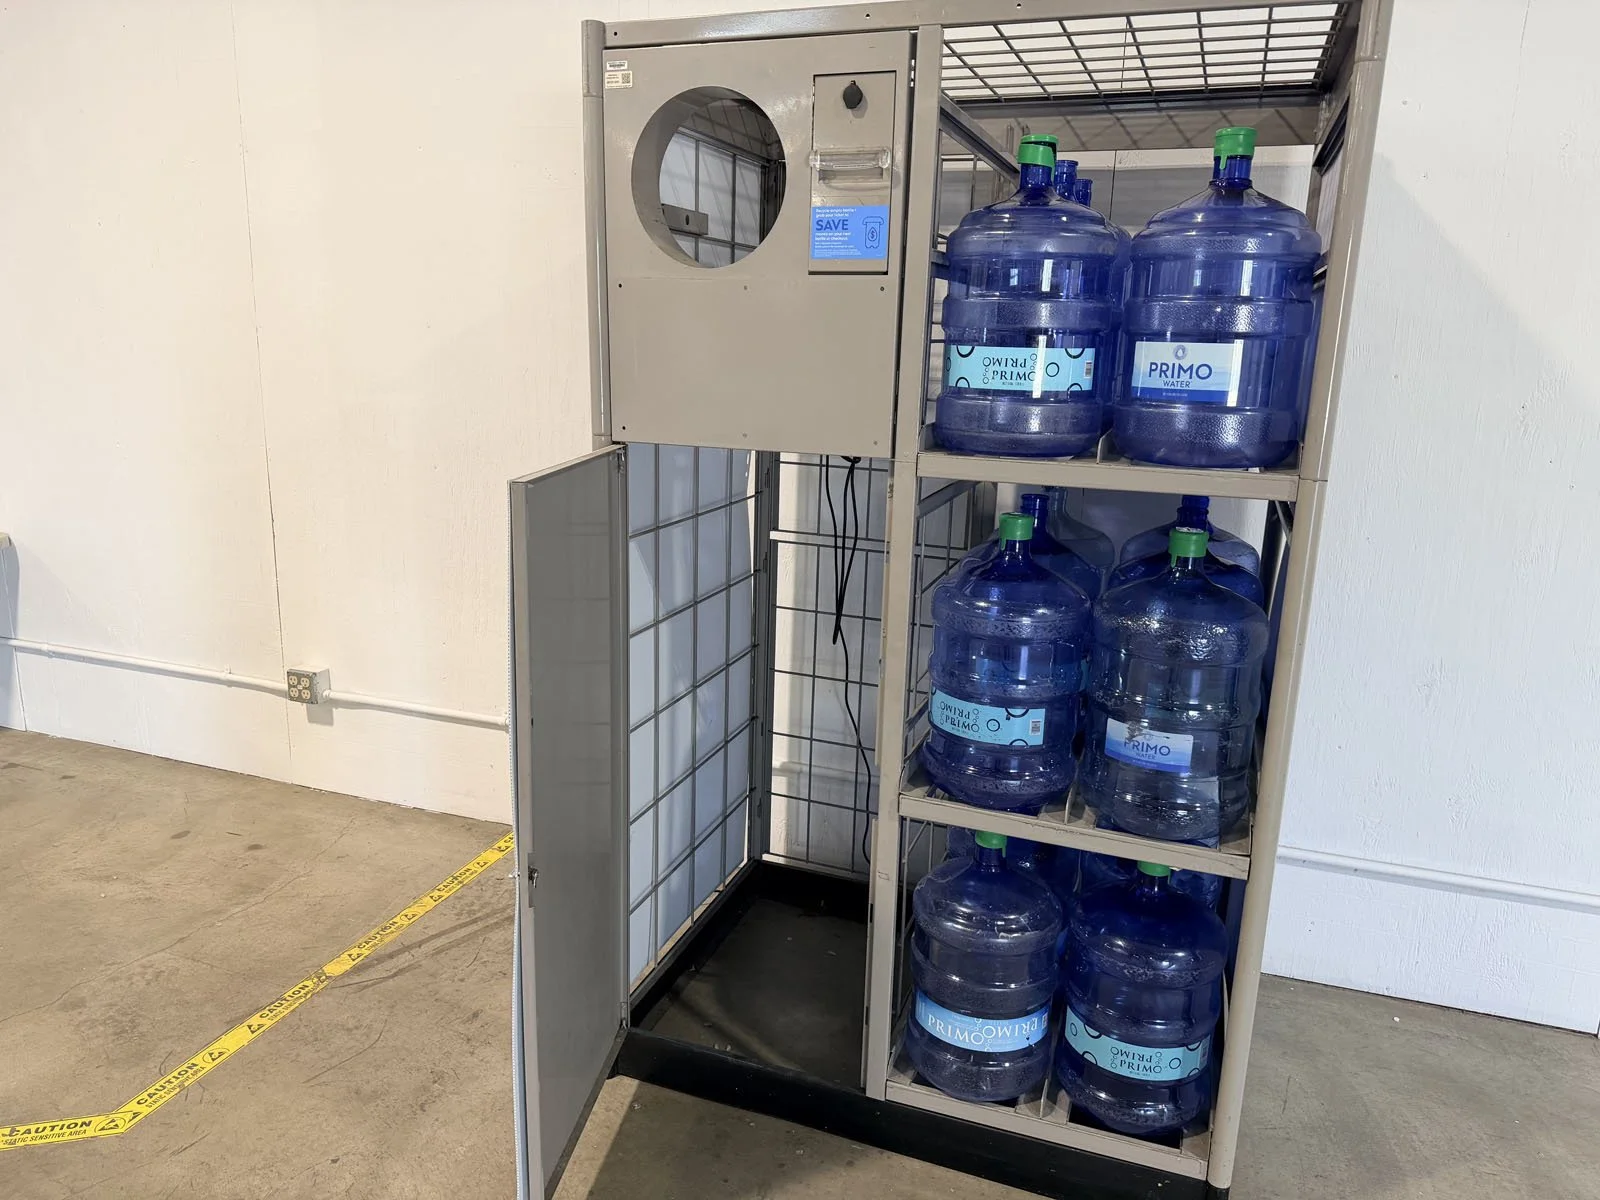
2: Find the Primo Brand Combo Unit (typically along the interior front wall) and take a BEFORE photo 📷 in the mobile app of the unit prior to starting any work.
➡ There are many different brands of signage by Primo Brands (ie. Primo Water, Poland Spring, Deer Park, Arrowhead, etc). All instructions are exactly the same regardless of brand type that was sent to you.
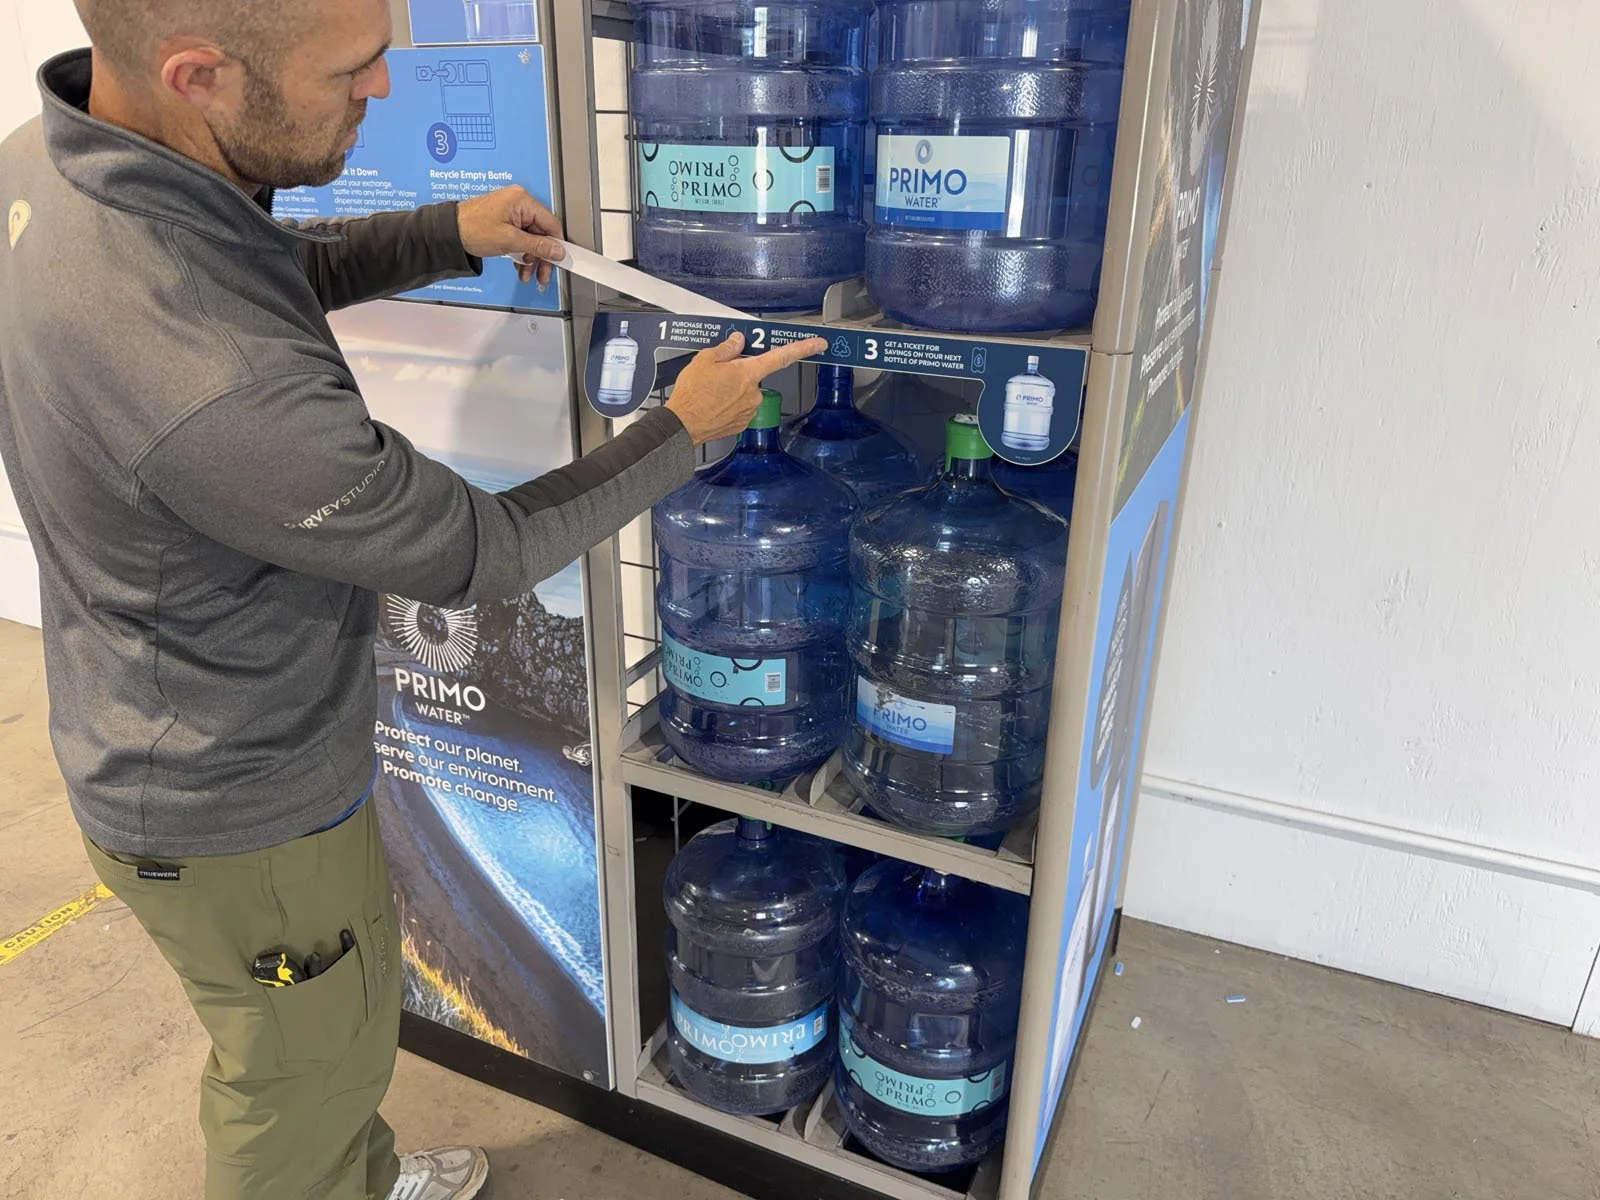
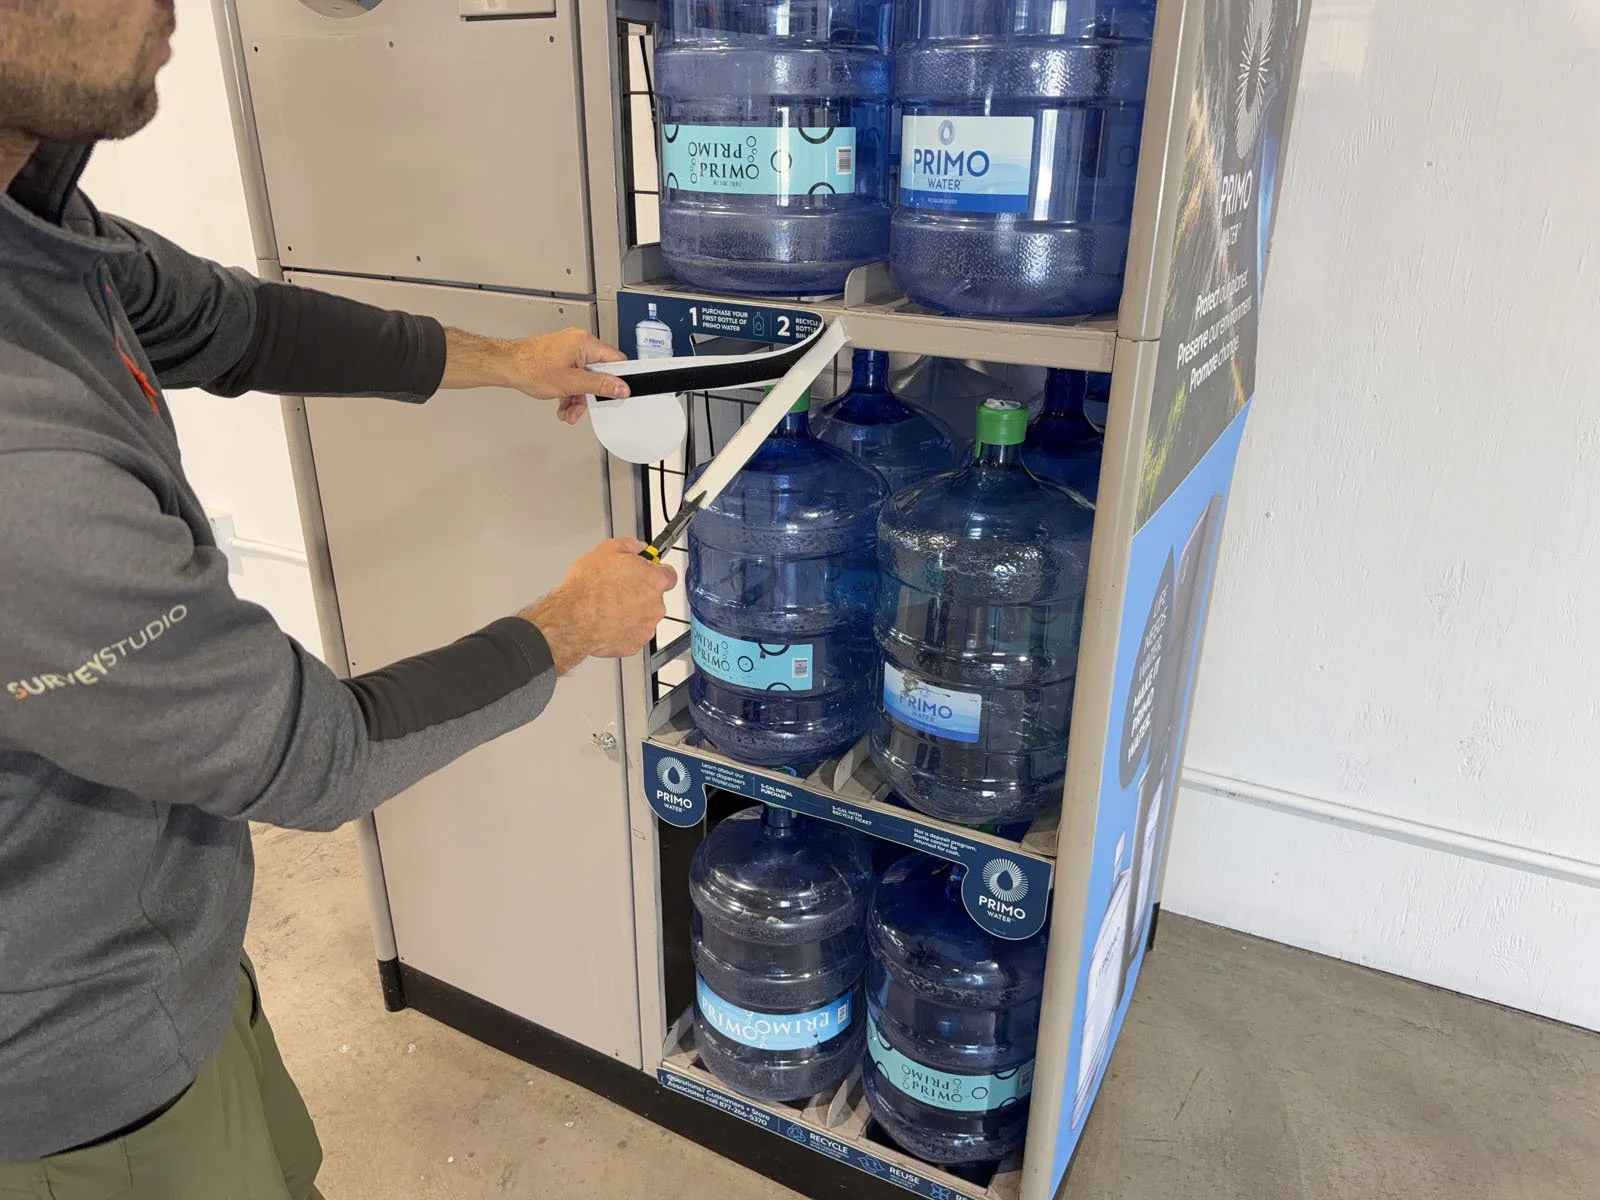
3: Remove the existing signage by breaking off the push-in clips using pliers. Tip: If you can reach the inside, it’s easier to break off the backside of the clip first using pliers, then remove it.


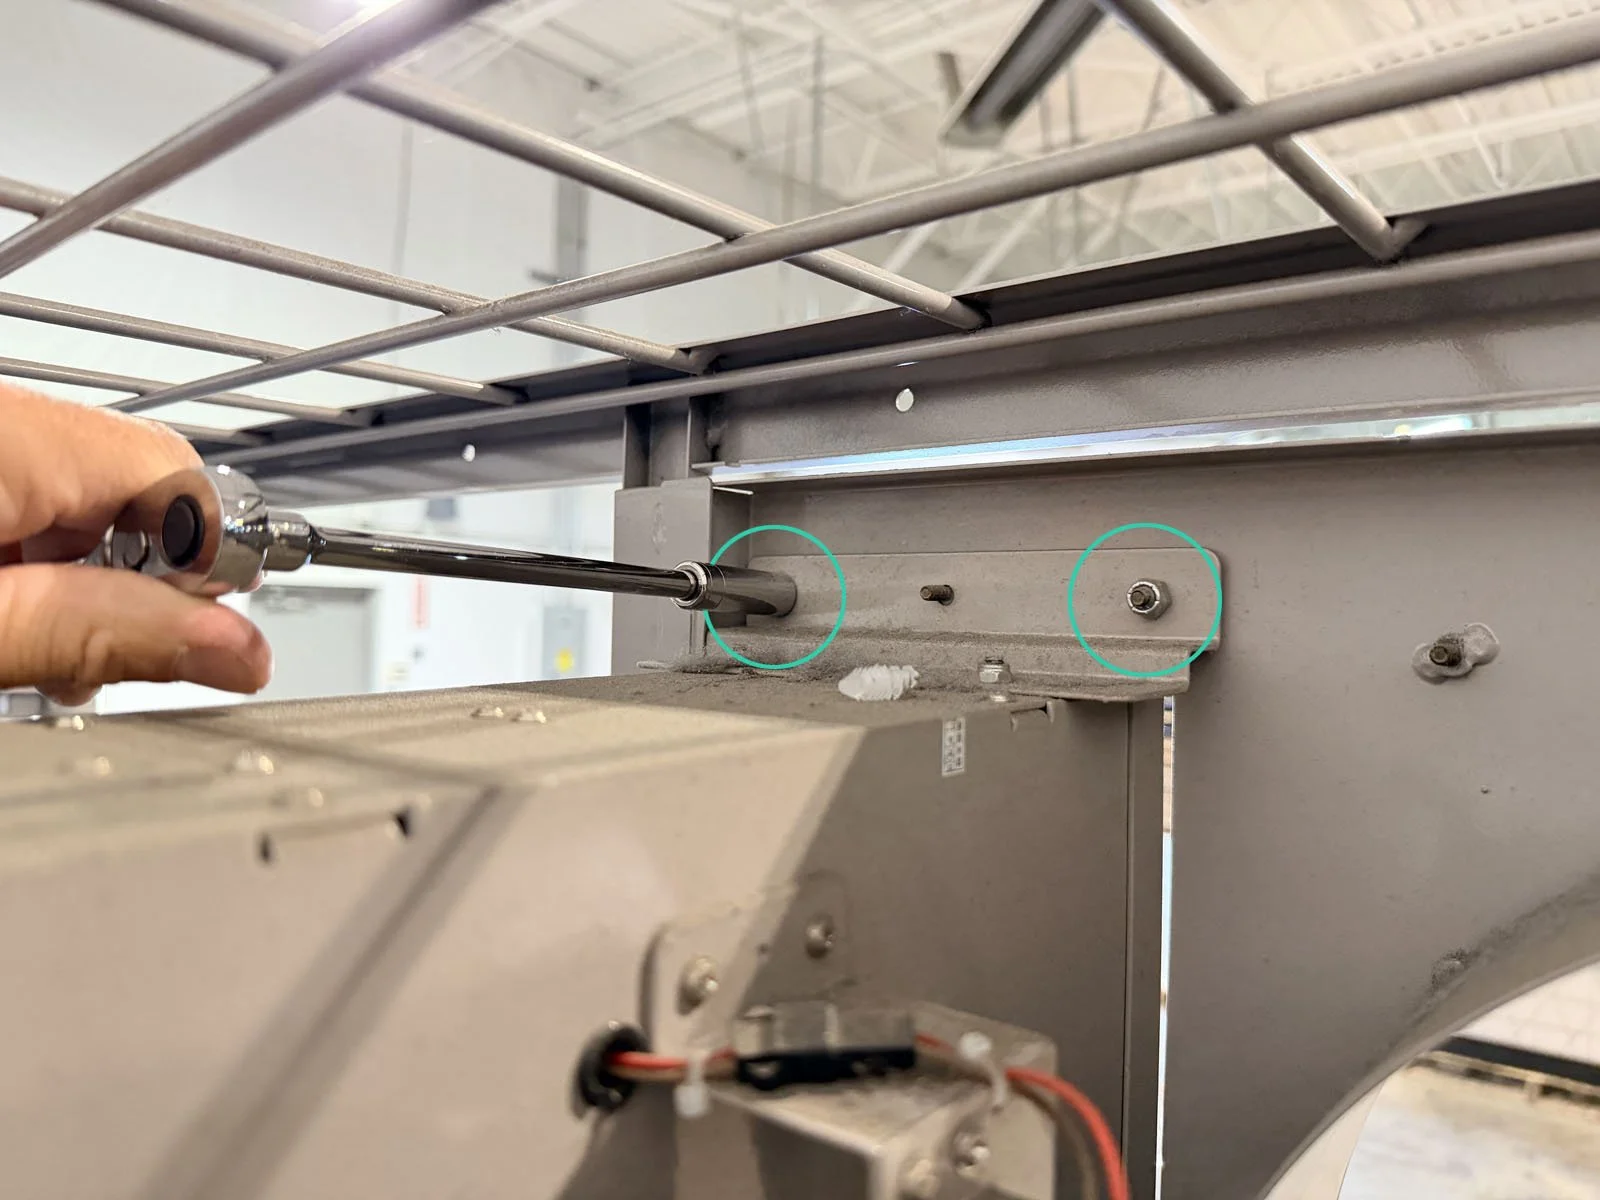
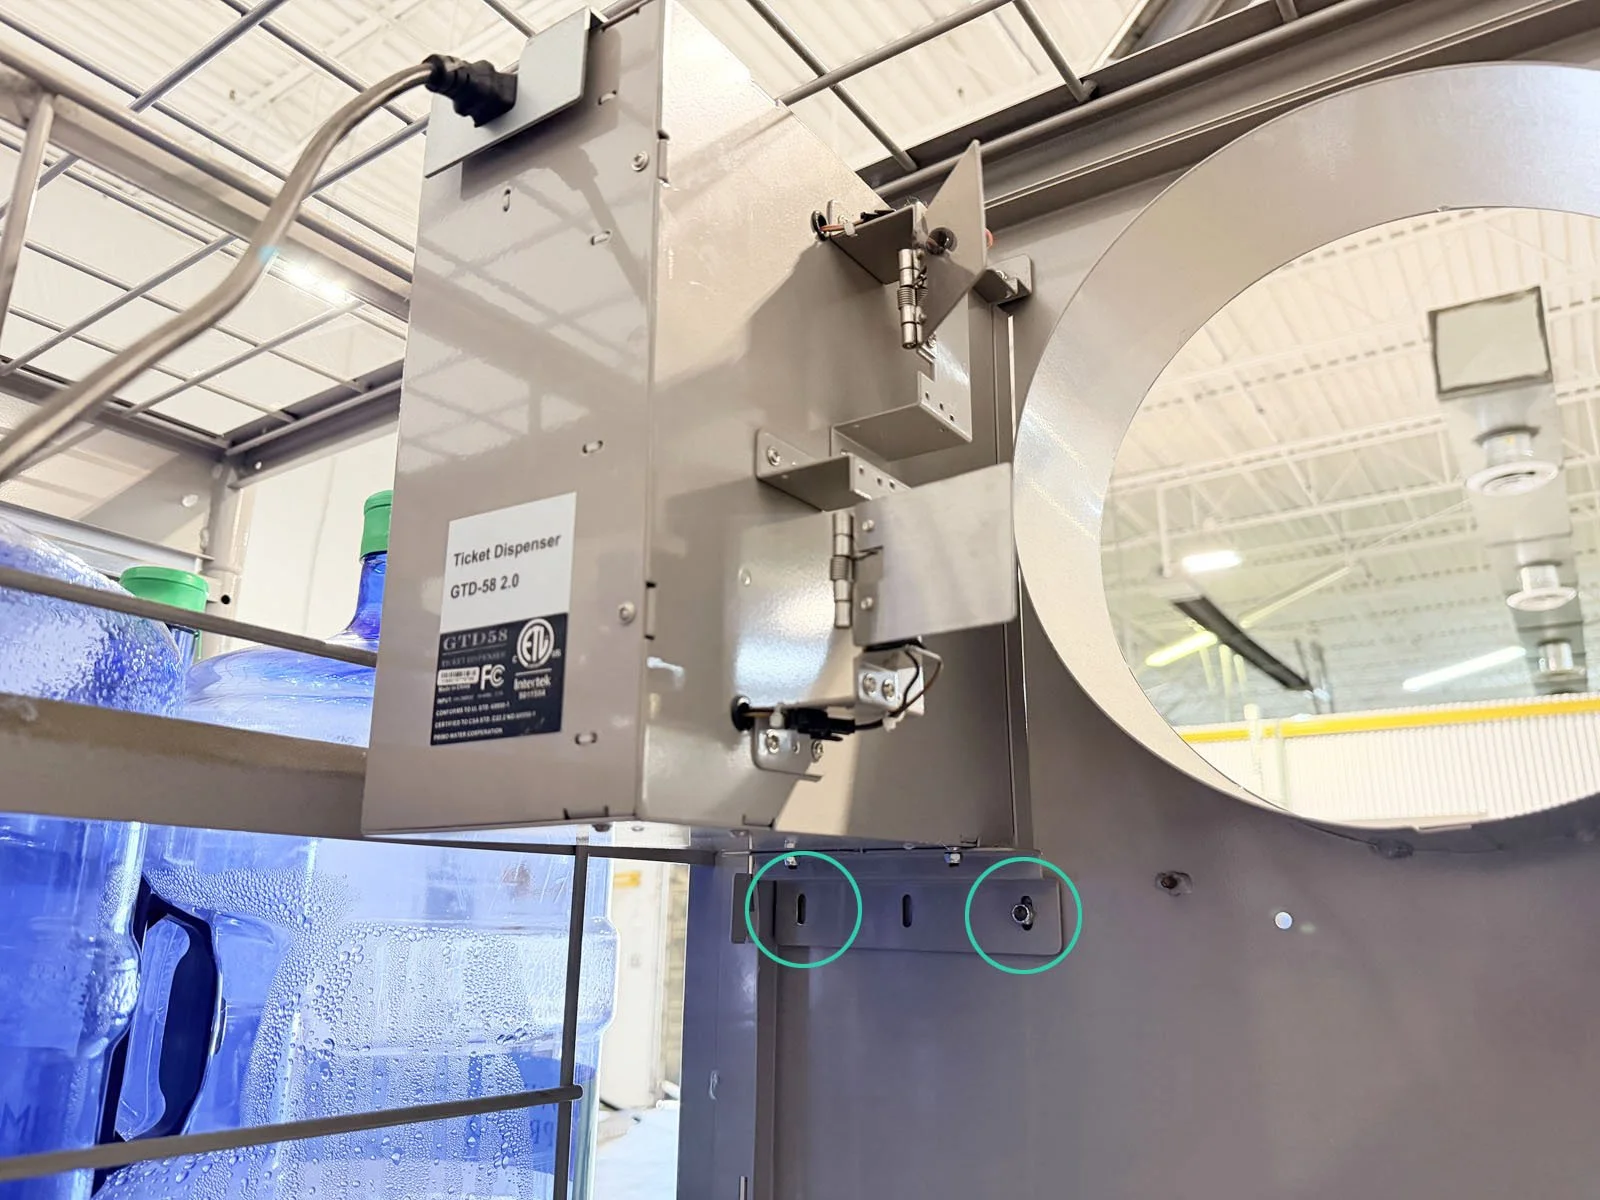
4: Remove the existing printer. Unplug the power cable from the outlet, then turn the latch on the front door to open it. From inside the Combo Unit, remove the 4 nuts from the mounting bracket for the printer using a 3/8 socket wrench. You’ll need a 6” extension to reach the upper nut on the return chute side. Remove the entire printer unit with mounting bracket and the power cable and set aside. Shut the front door and turn the latch to lock it.
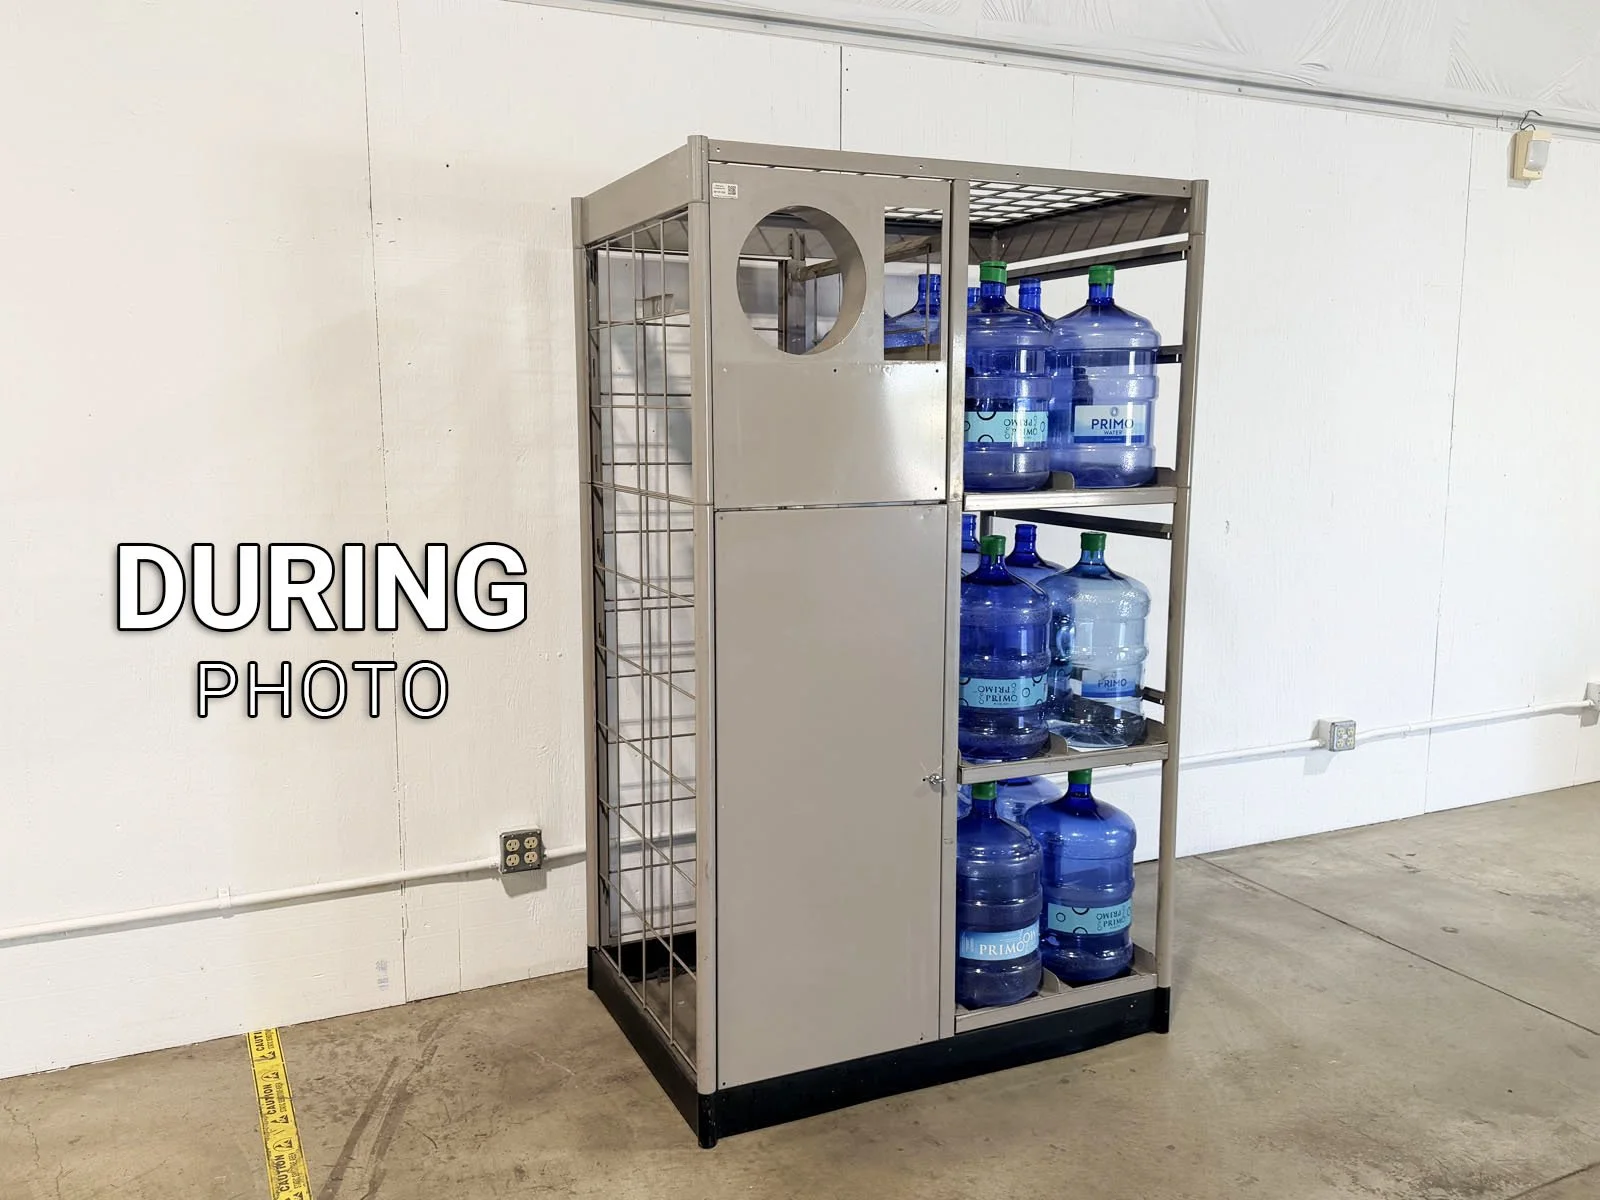
5: Take a DURING photo 📷 with the signage and printer removed from the Combo Unit (a blank display).

6: Attach all new signage using the push-in clips provided. If clips are difficult to push in, a rubber mallet may be used to gently hammer in the clips (be careful, the clips can easily break).
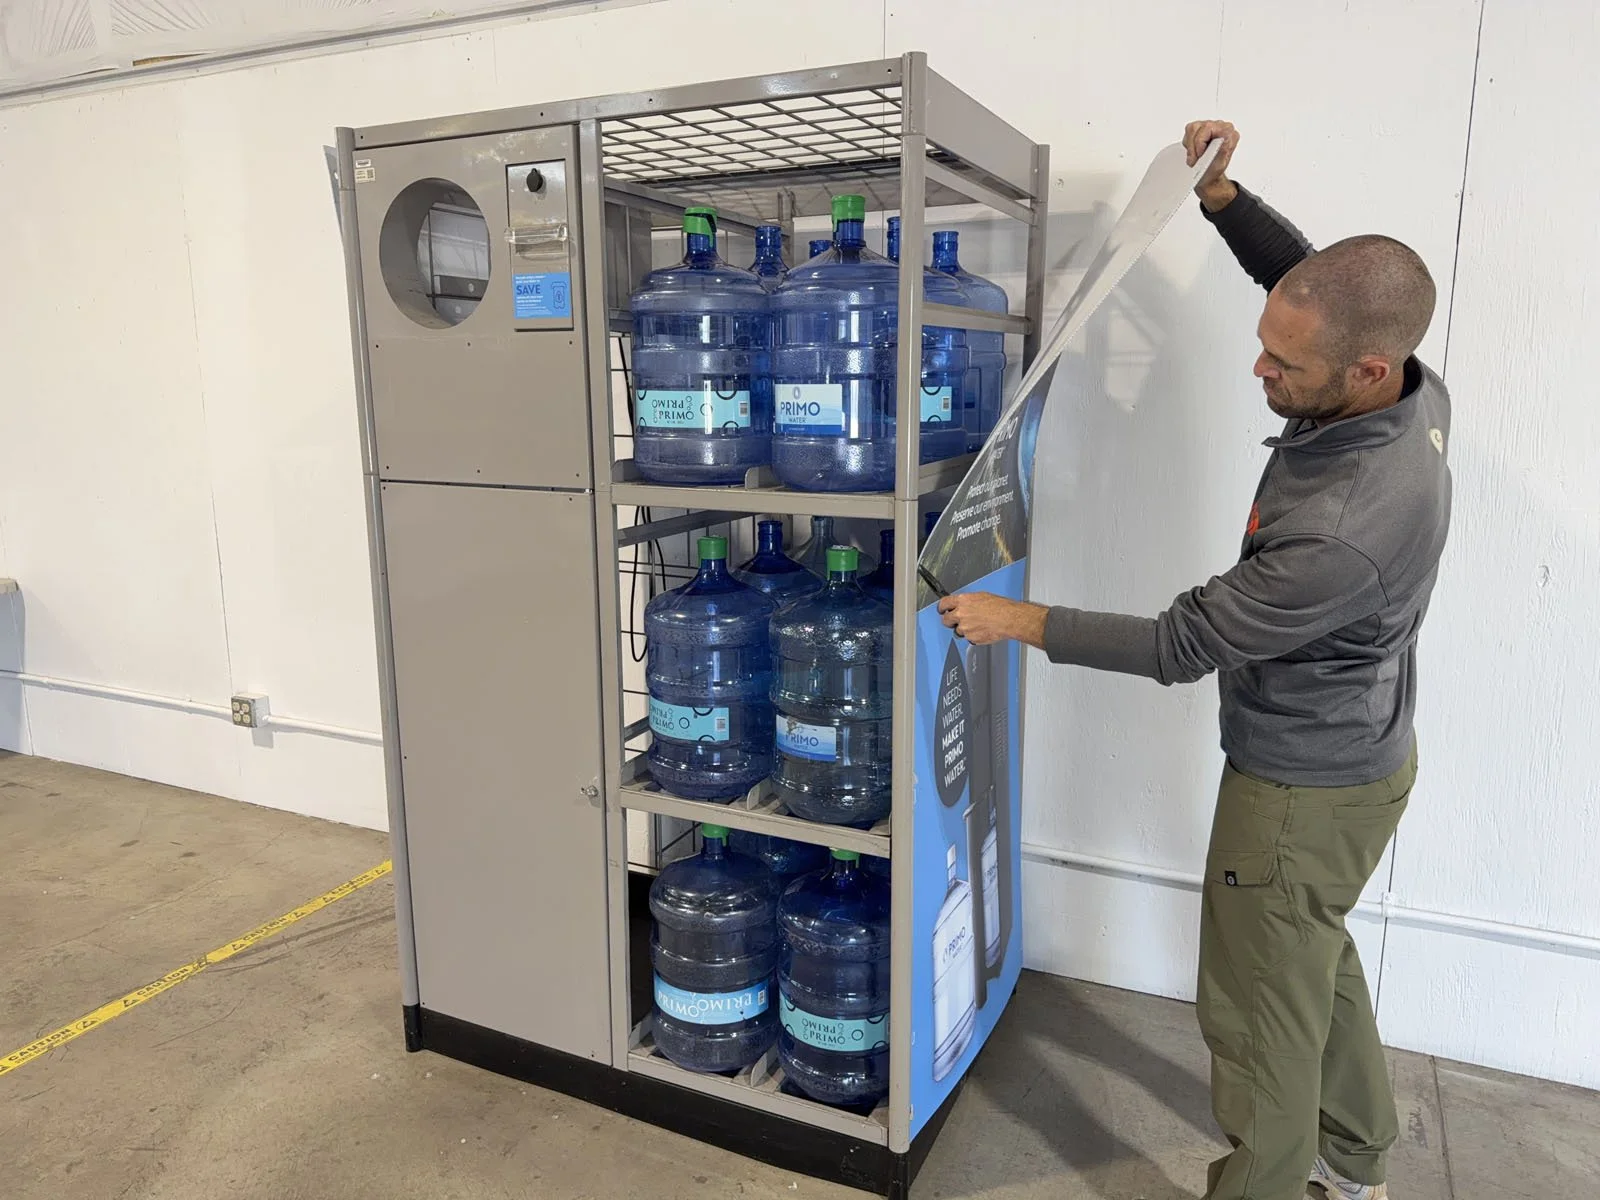
Side Panels (x2): These come folded in half; unfold to install with 10 push-in clips per side. If the Combo Unit is adjacent to other displays or machines, you must slide it out, then replace both side panels.
Combo Unit Header: Align with the holes in the top bar of the frame, then attach with 6 push-in clips.
Shelf Strips: These must be installed in the correct order. Remove the backing and apply to the front of each shelf. Top shelf has the number “1, 2 and 3” on the strip. Middle shelf has “Learn about our water dispensers…” across the strip. Bottom shelf is straight across without the larger tags at the end of the strip.
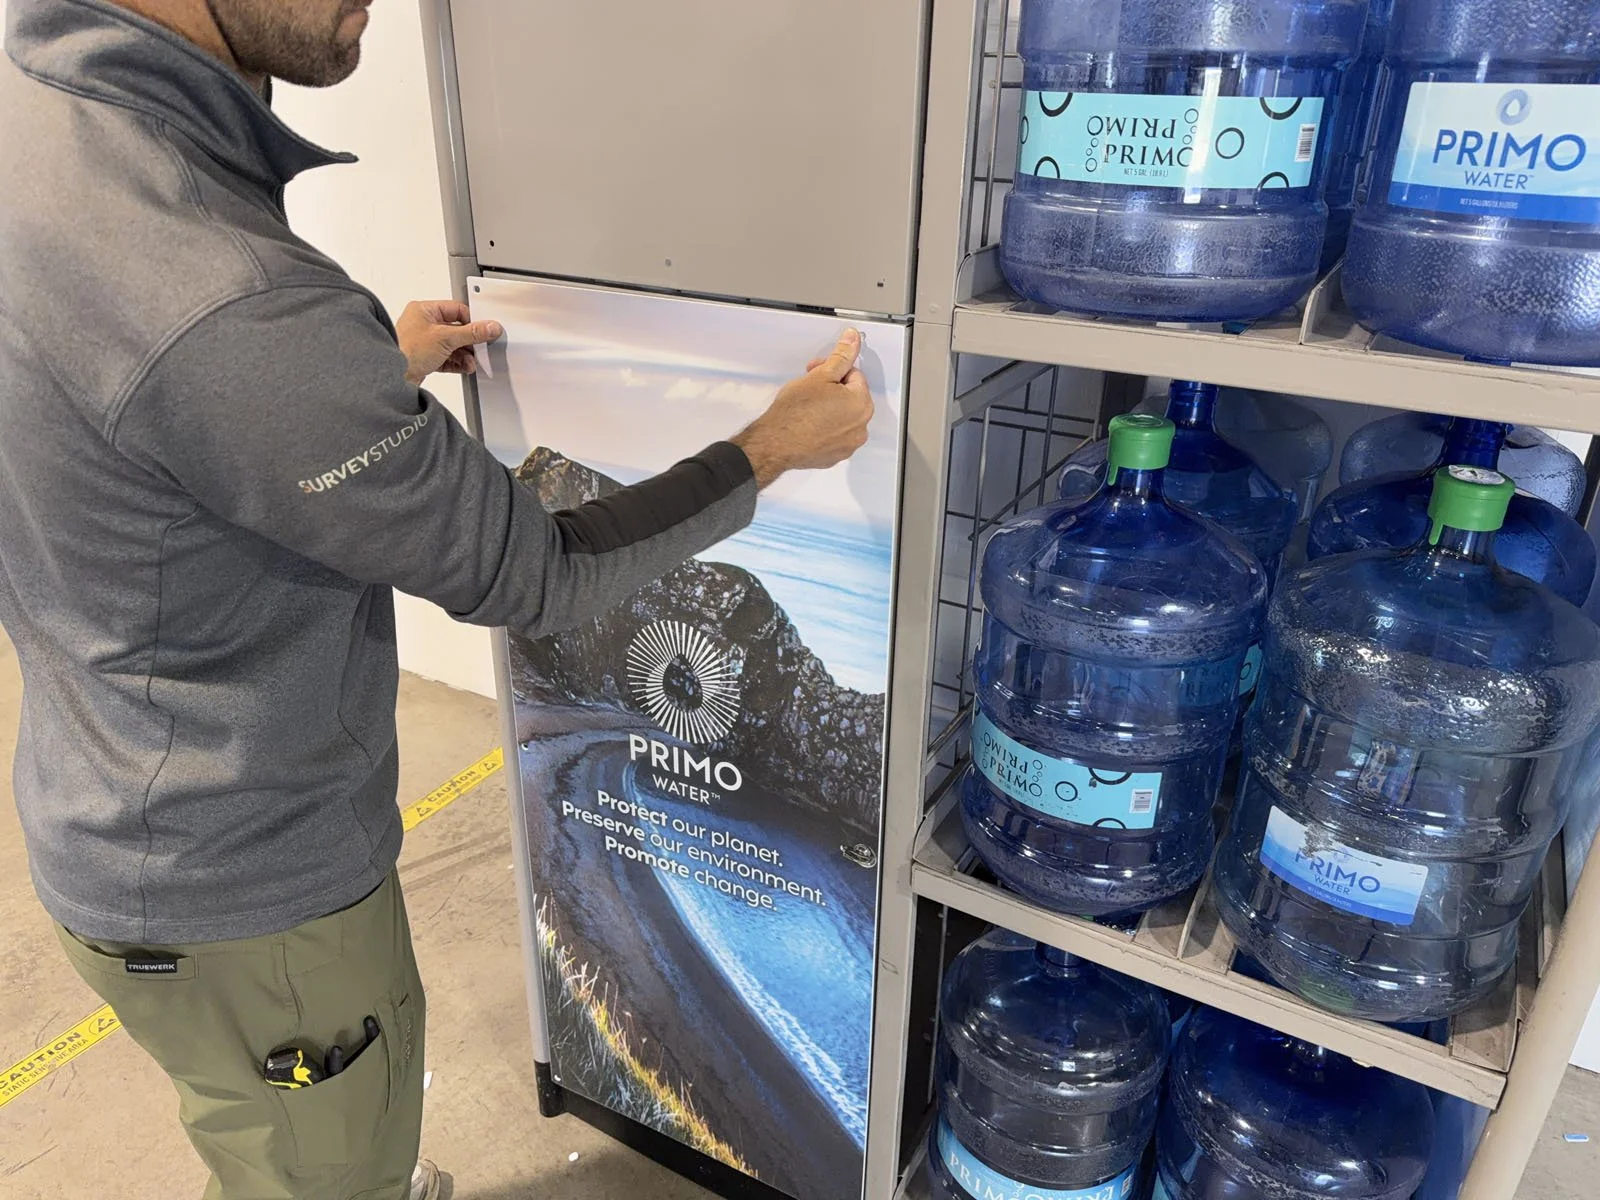
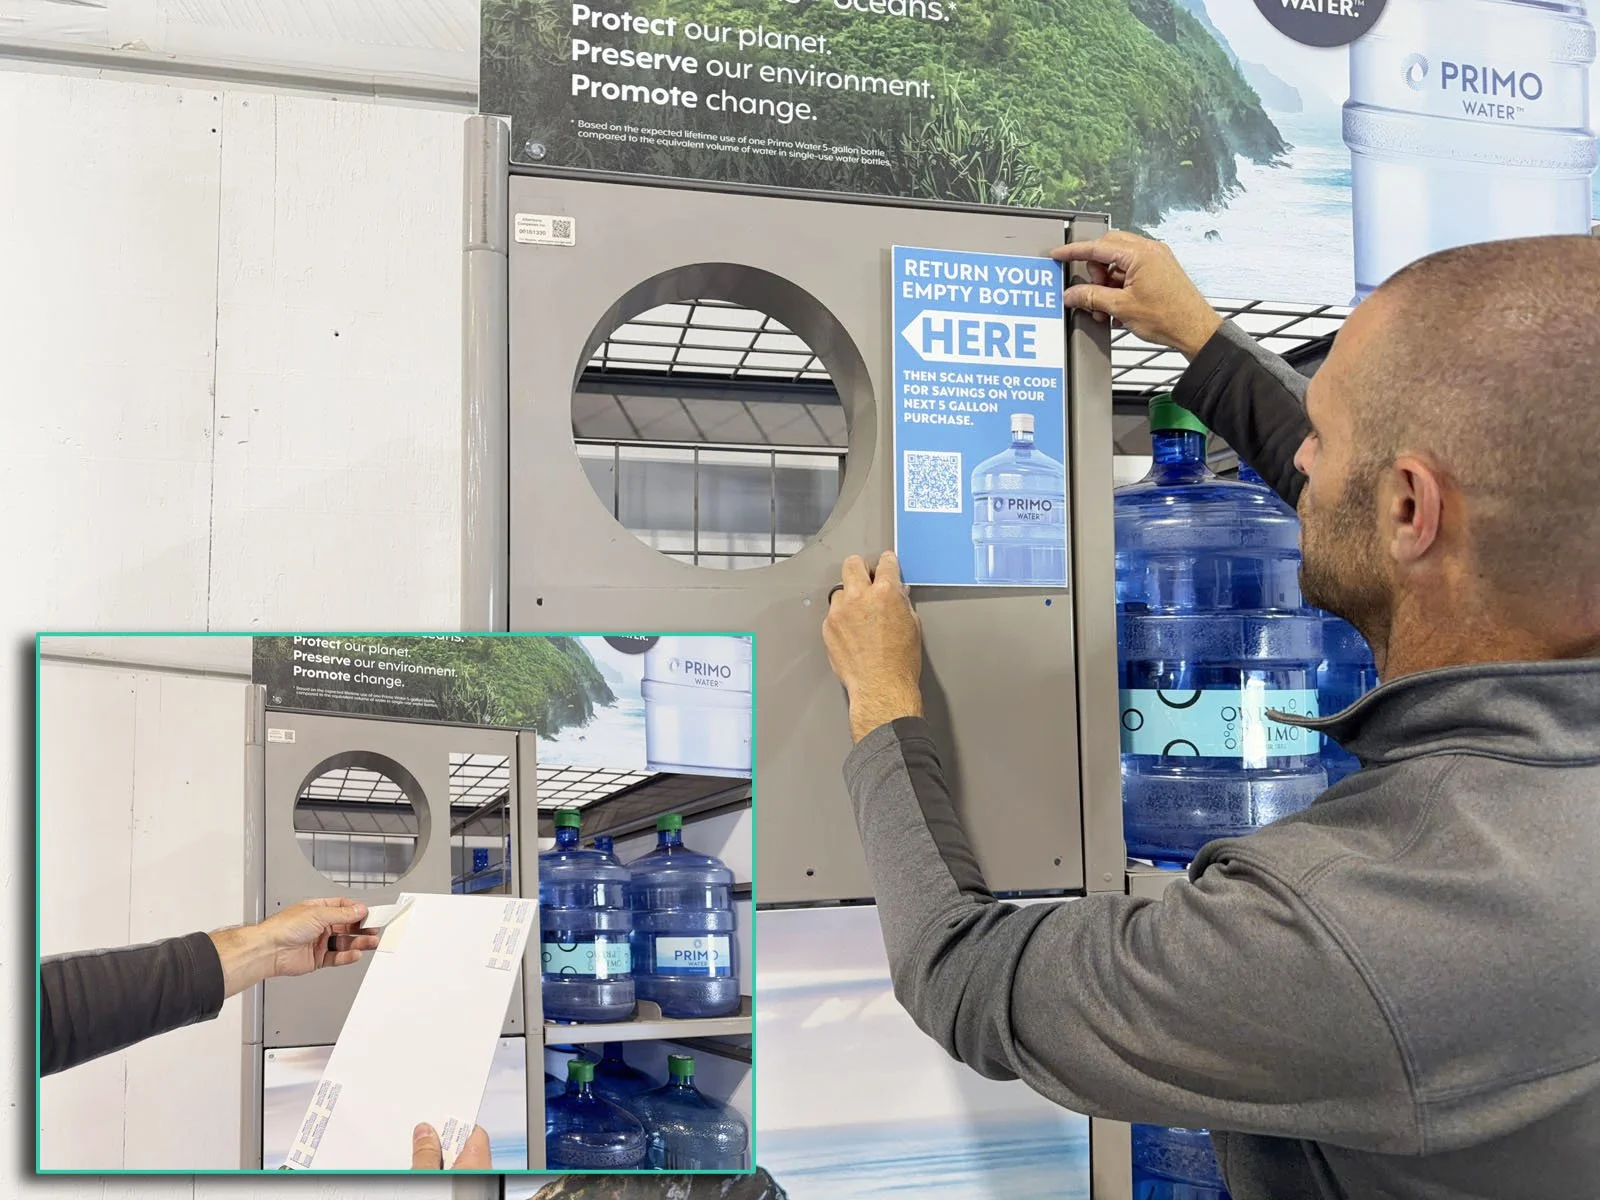
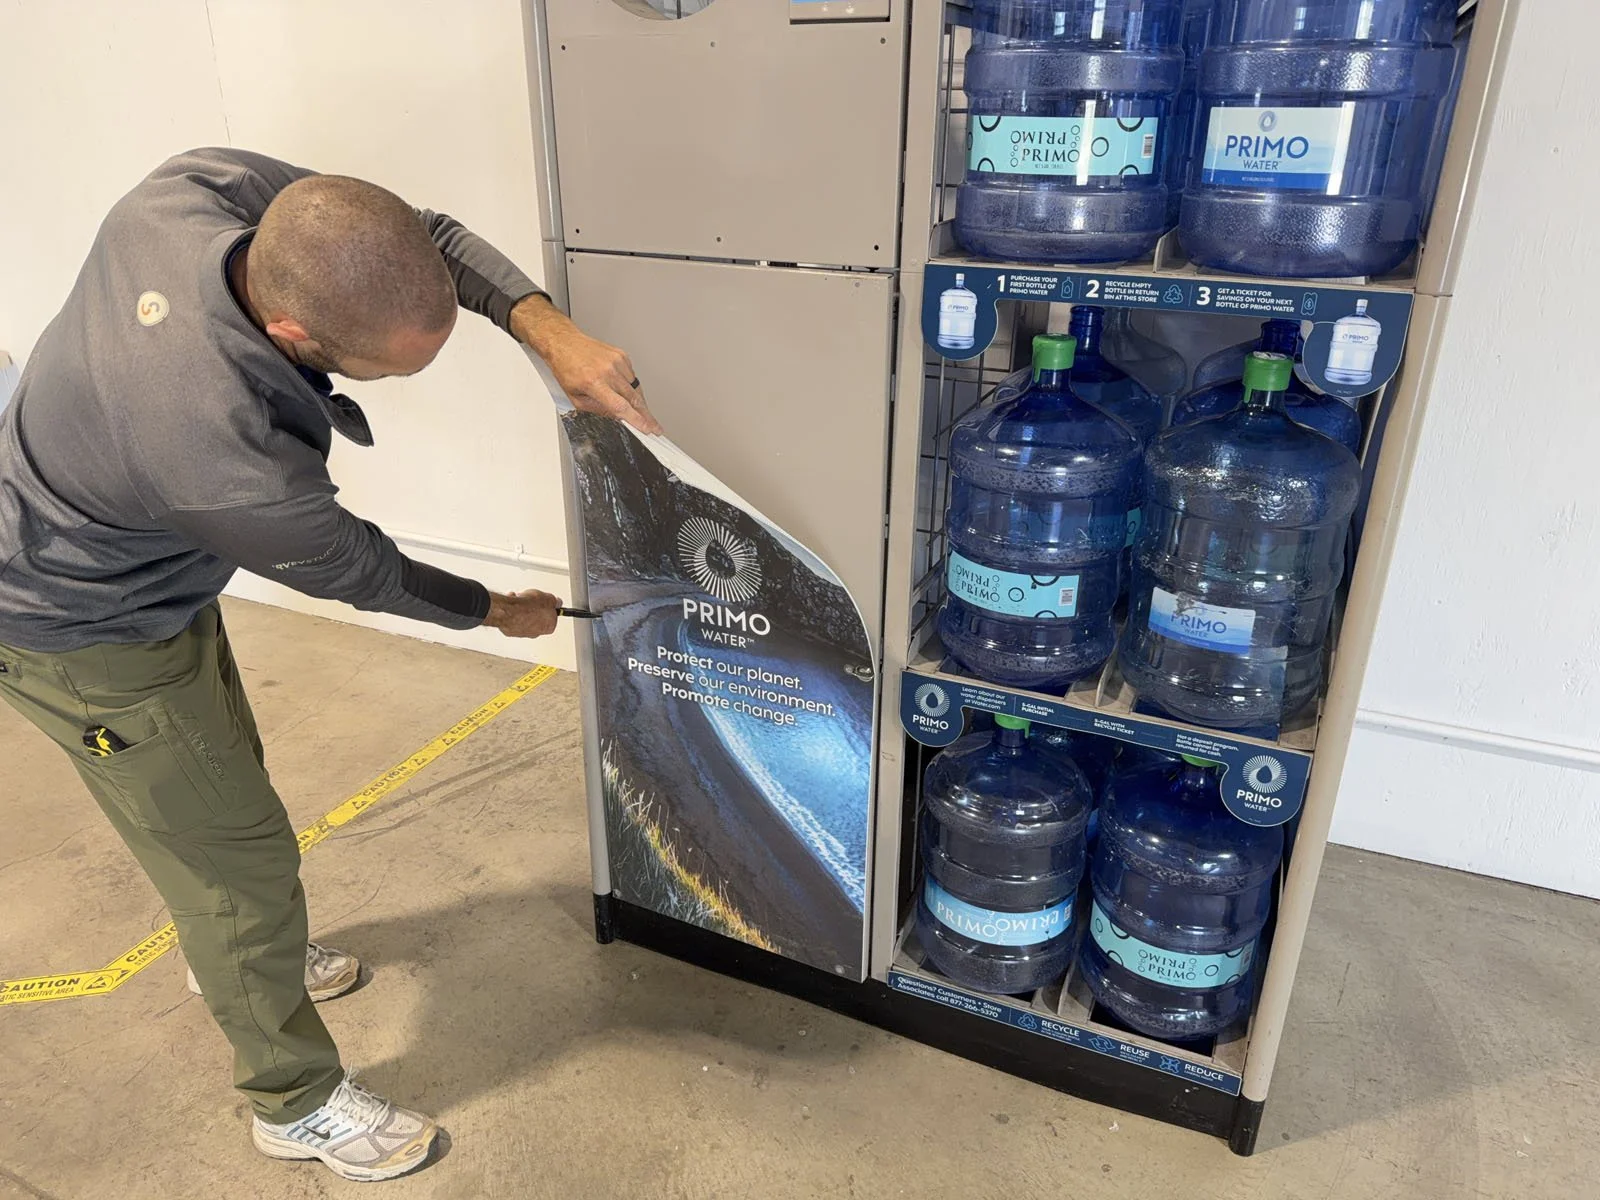
Filler Panel: Peel the backing from the double-sided tape and attach over the hole where the printer was removed.
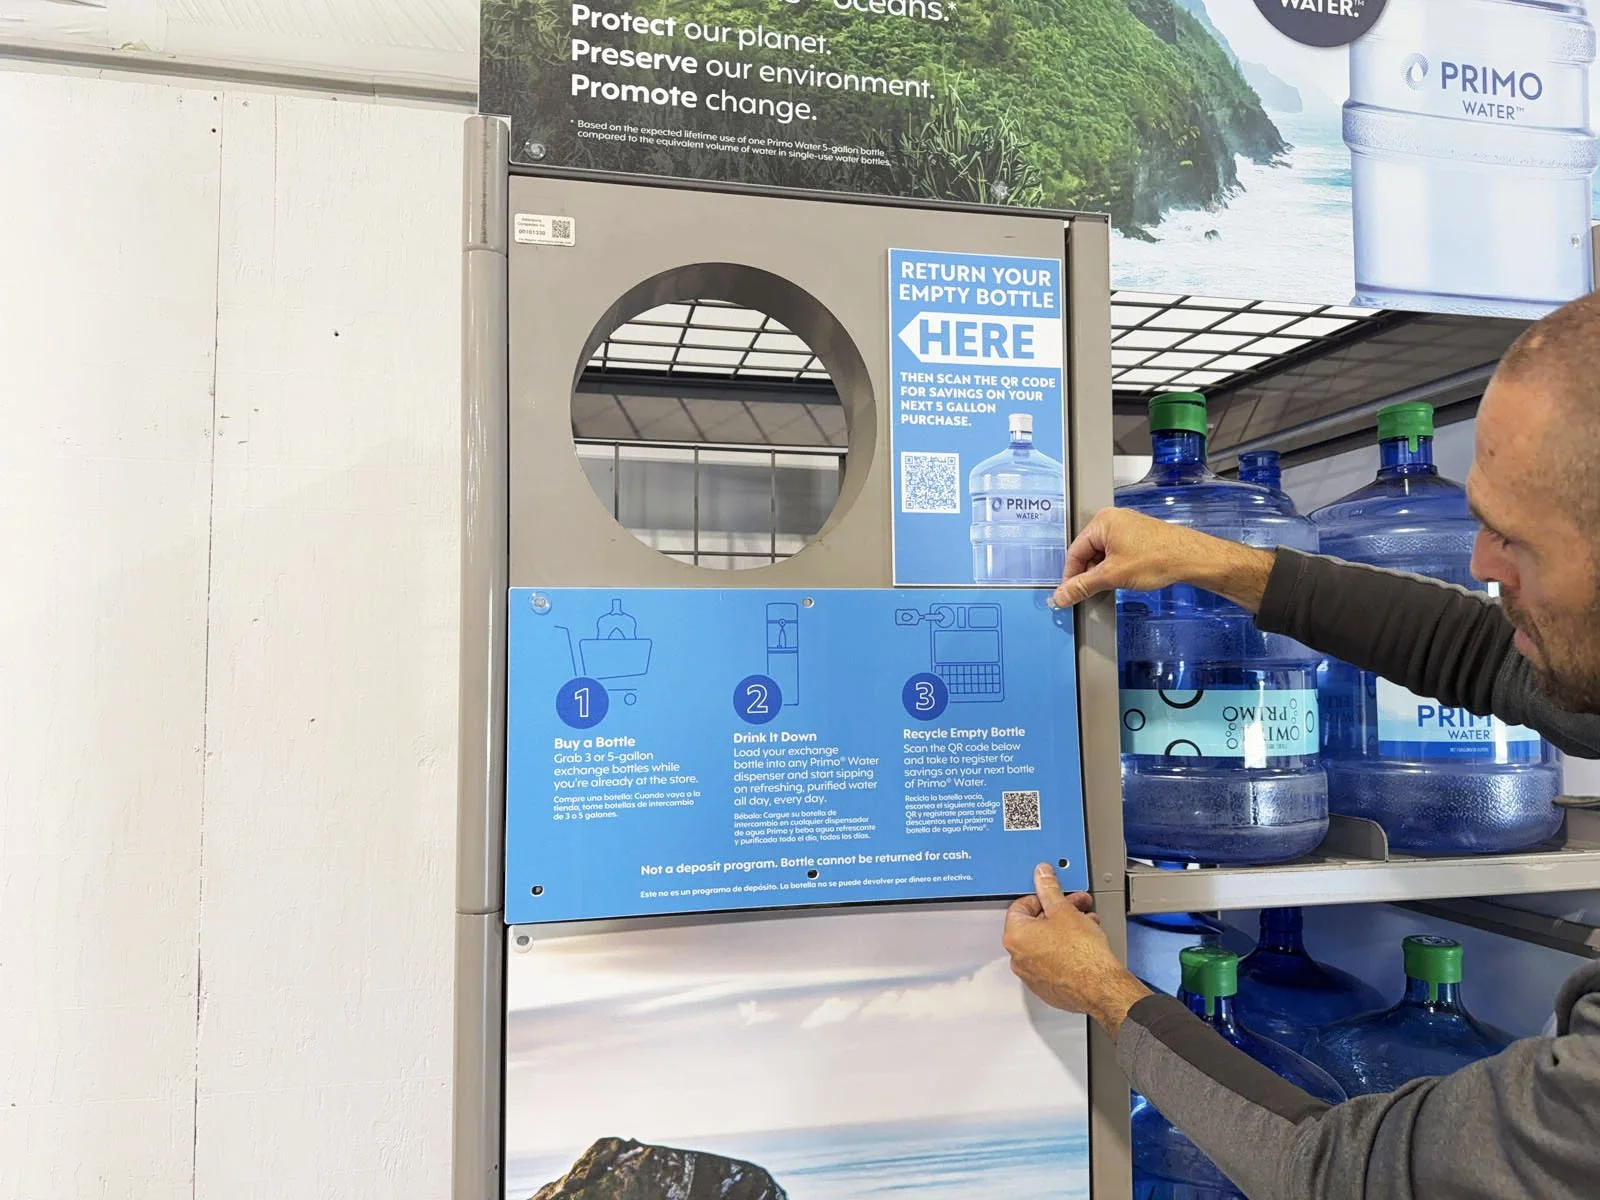
Instruction Sign: Attach below the filler panel using 6 push-in clips.
Door Sign: Attach to the front door using 6 push-in clips.
7: Clean up the area. Dispose of the old signage and printer in the back of the store, typically in their receiving area.
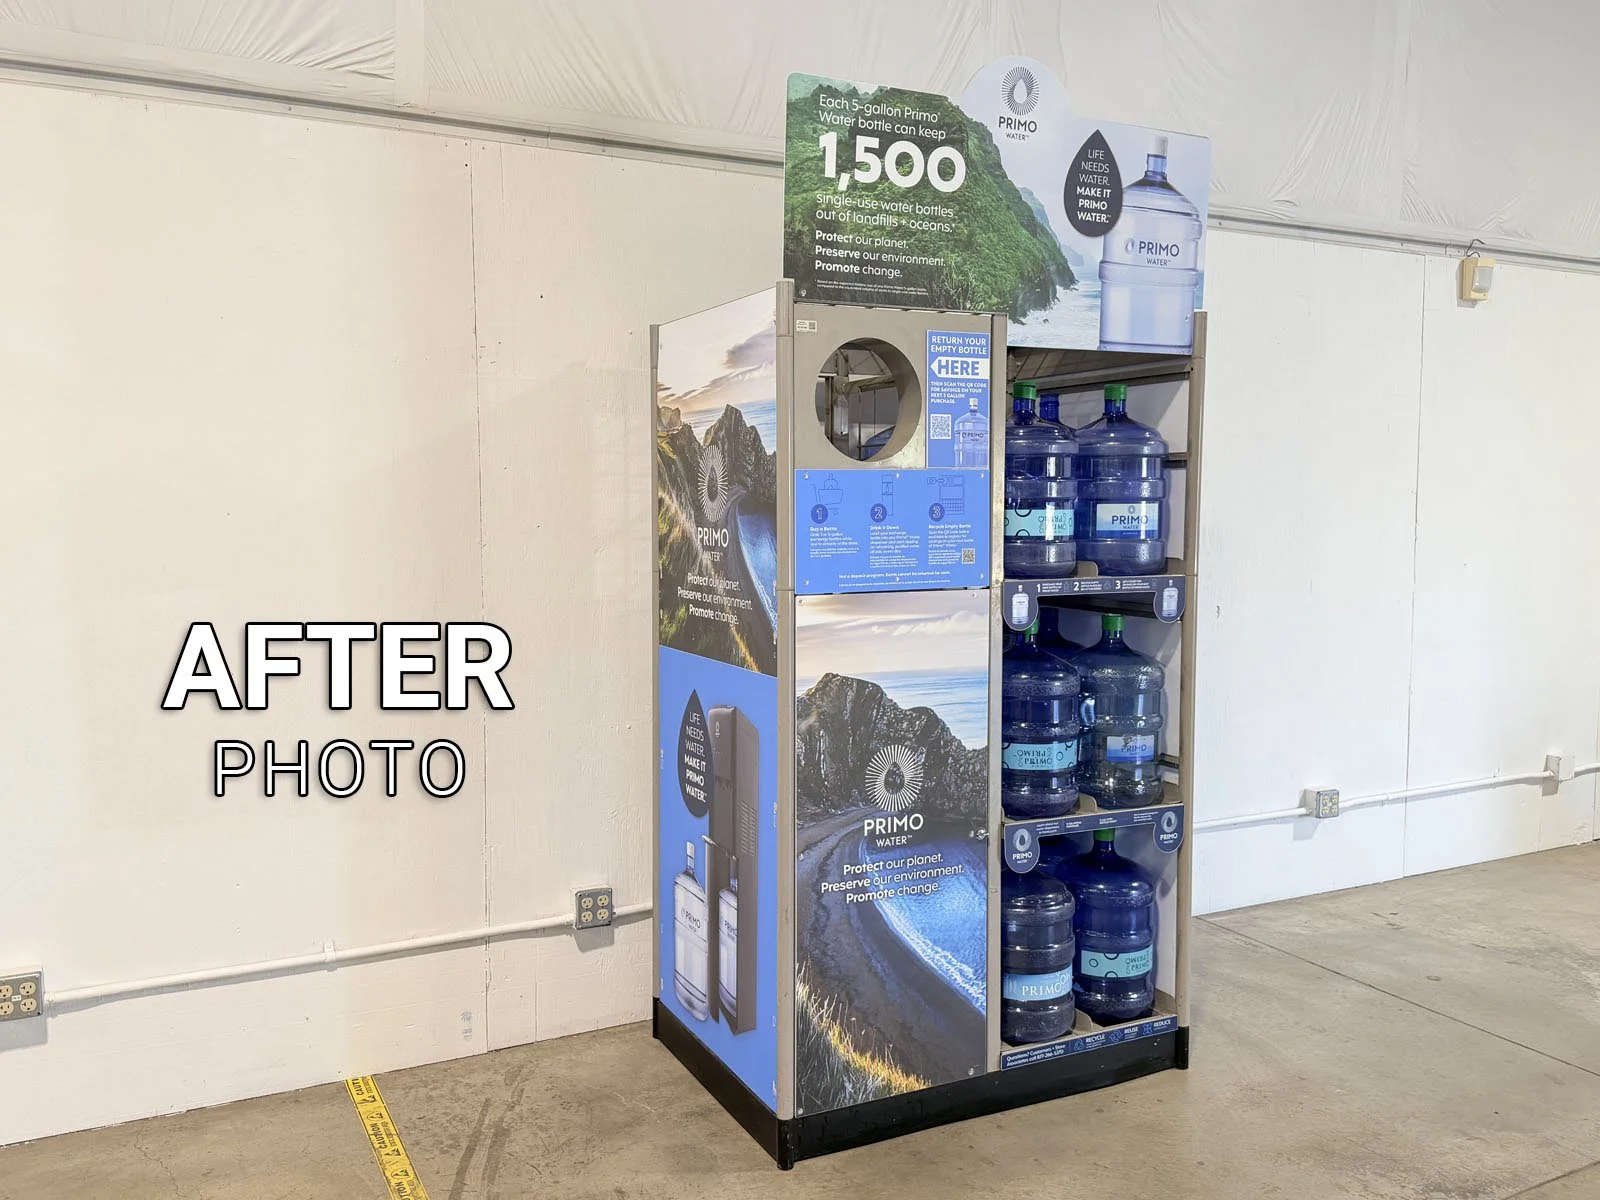
8: Take an AFTER photo 📷 while standing 15’ back to show the overall Combo Unit, then finish the form in FastField.